Showing posts with label ancients. Show all posts

Sunday, January 17, 2021

Projects for 2021 and completed projects from 2020

Back in January of last year I posted the following projects for 2020. Projects for 2020 are as follows: All are 6mm unless noted otherwise. 
Complete Late Roman/Byzantine army completed 
 Complete Sassanid army completed 
 Add cavalry to Achaemenid army completed 
 Finish Warbands not started 
 Make additional built up areas in progress 
 Make pine Forest not started 
 I have a dozen two foot square interlocking mats that have been painted a light brown to finish in progress 
 I have a bunch of 28mm Fantasy figures in various stages of painting to finish. Finished some armies, working on others 
 Add a few more 28mm science fiction building paper buildings. completed 

 In addition to the above I also completed a 28mm sci-fi alien battle group, sci-fi IFV's and tanks. I could have done quite a bit more, but spent the later part of the year doing things other than wargaming. 

This year I will be working on the items that were not completed. The 6mm warbands and the pine forest are the lowest priority at the moment. The 6mm built up areas, two foot square interlocking terrain mats, and the remaining 28mm fantasy have the higher priority.

Monday, October 19, 2020

Fistful of Lead Bigger Battles

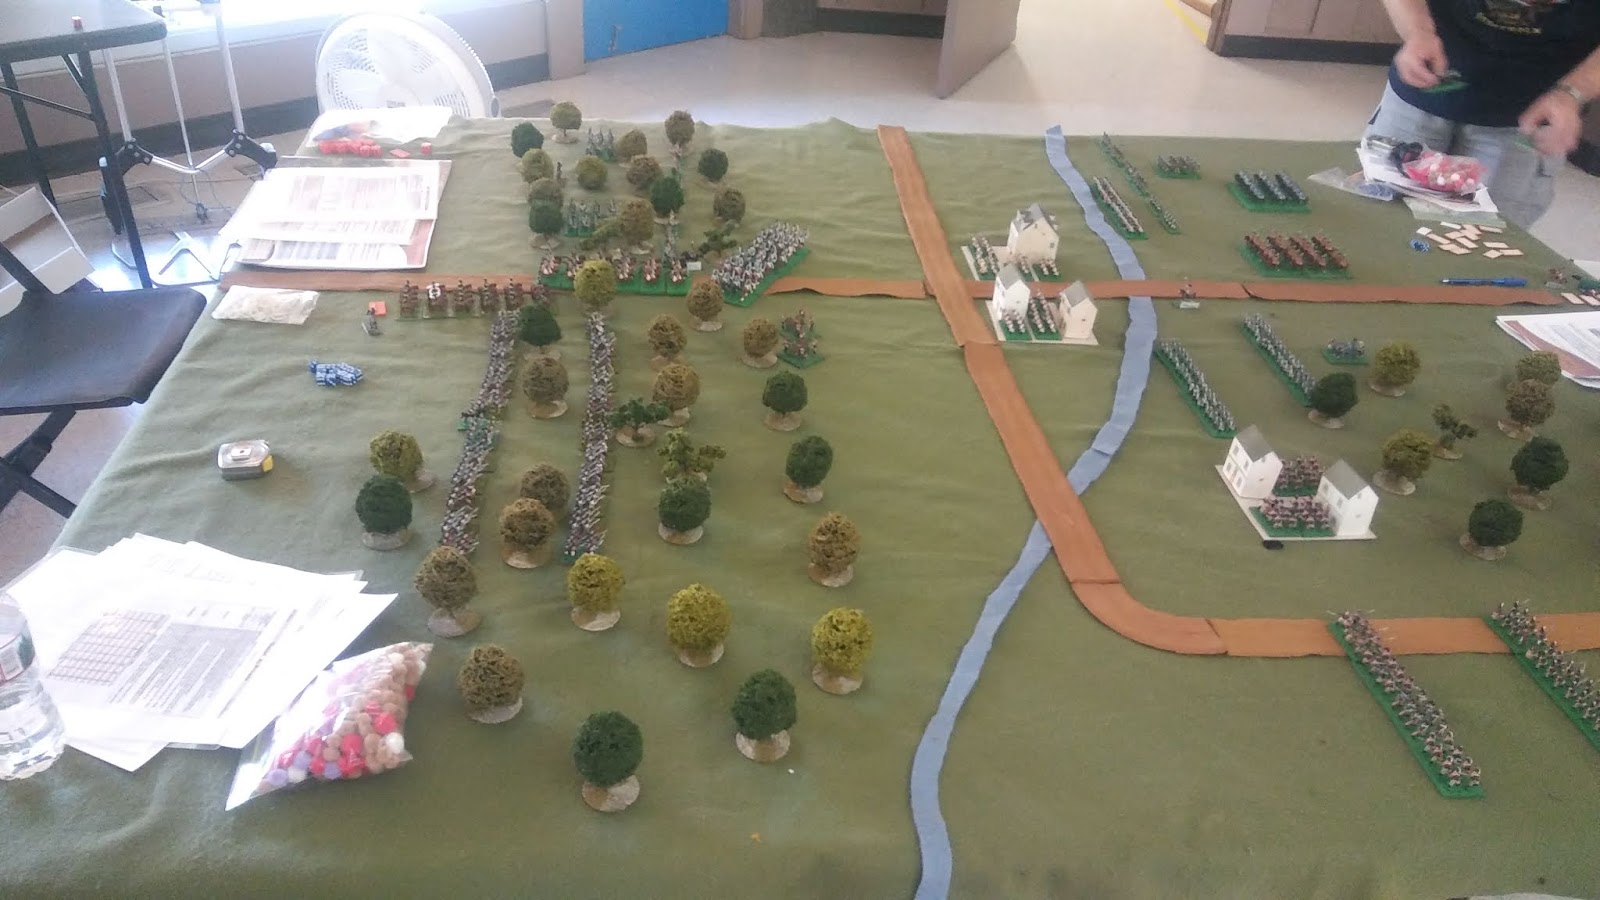
 This past Sunday we played a game of Fistful of Lead Bigger Battles at the club.   This was our first game with the rules and we made a few mistakes, though nothing major.   The game was set in the sixth century A.D. with Byzantines vs Sassanid Persians.    The Byzantines had six cavalry units and nine infantry units.  The cavalry was bow and javelin armed while the infantry had some units of mixed archers and spear, a couple of units of heavy archers and three units of heavy spear.   All were regulars.  

The Sassanids had two cataphract units, three units of light bow and spear armed cavalry, three units of spear armed infantry, two units of mixed spear and bow infantry, and five archer units.   The cataphracts were regulars, the light cavalry and mixed spear/bow were tribal, and the rest irregulars.  Unfortunately, I forgot to bring the elephants so the Sassanids were missing one of their better troop types.  

During the course of the game the Byzantines had better die throws and broke or eliminated over half the Persian units.   The Persians were only able to eliminate two of the Byzantine infantry units.   One of them disappeared in spectacular fashion when it engaged a Persian unit and both side eliminated the other with their close combat die rolls. 

All units on both sides were eight figures strong.  I only took one decent picture during the game.   It is posted below with the Byzantines at the top and the Sassanids at the bottom.


Thursday, April 30, 2020

Byzantine and Sassanid Persian Cavalry

I finished basing the Sassanid and Byzantine cavalry that I painted this month.  The figures are all from the Baccus 6mm Sassanid Persian line.  Currently no one makes all the figures needed for Early and Maurikian Byzantine armies.  However, by adding shields and paint, I was able to convert the Sassanid cavalry to close approximations of the Byzantine counterparts.

I was able to locate a set of 3mm and 1.5mm paper hole punches.   2mm would have been a better size for the Byzantine shields and with the 1.5mm punch being too small I used the 3mm punch.  I had hoped to use Paintshop Pro to reduce the late Roman shield patterns from the Notitia Dignitatum, but they were too detailed and did not print correctly.  I ended up just printing red on cardstock and punching out the shields that I glued to the figures.

The Sassanids are on the left and the Byzantines are on the right.  There are 180 armored horse archers in the back, 180 lance and bow cavalry and 18 command figures.   The Byzantines have 144 lance and bow cavalry on unarmored horses in the back, 144 armored horse archers in the middle, 72 lance and bow cavalry on partly armored horses in the front, and 8 command figures.   I have other command figures for the Byzantines also, but those are from a while back.   The 72 figures on the partly armored horses were in a previous post.  I will be adding flock to the unfinished bases later today.


I was painting these figures throughout the month while taking breaks to paint the Achaemenids and NKE's.
The Achaemenid cavalry that I finished earlier this month are here
and the New Kingdom Egyptian army is here

The total figures painted for this month are 923 mounted, 677 foot and chariot crewmen, 30 chariots, and 60 chariot horses.


Friday, April 24, 2020

Sassanid Persians and Byzantines

I am in the process of replacing my Sassanid Persian and Byzantine armies.   I did have armies composed of figures from Heroics and Ros, but sold them to another club member a while back.  I would have kept them, but the figures were based on outdated information.  Currently only Baccus makes updated figures for Sassanid Persians.   Unfortunately they do not make Early Byzantine or Maurikian Byzantine figures.   However, with a bit of painting and adding shields to the armored horse archers and the lancers on unarmored horses the figures will pass for Byzantines.

The following pictures are of the 180 Sassanid Persian armored horse archers and the 72 Byzantine cavalry on partially armored horses.   I still have 180 armored lancers to paint for the Sassanid Persians, 144 armored horse archers for the Byzantines, and 144 lancers on unarmored horses for the Byzantines.

To distinguish the Byzantines from the Sassanid the Byzantine cavalry will have iron armor for the partially armored horses while the Sassanids will have bronze armor for their horses.  I also gave the Byzantine cavalry red standards and shields while the Persian standards and shields will be in multiple colors.   I did try reducing and printing shields from the Notitia Dignitaum, but the images would not print clearly.

 The Byzantines

The Sassanid Persians

Monday, April 20, 2020

Achaemenid Persian Cavalry

I completed the second set of figures this morning.   They are from the four different sets of Achaemenid cavalry made by Baccus 6mm.  There should have been a total of 180 figures, but six of them were from some other nation.


Sunday, April 12, 2020

New Kingdom Egyptians

One of the clubs that I belong to has a painting "competition" for the month of April.  The option of the contest is to paint as many of unpainted figures as possible.

Today I completed one of the painting projects that I am working on this month.   The army has three "divisions representing the Amun, Re, and Suktekh divisions.   Each division was given a specific color to differentiate them. These are red, yellow, and blue.  In addition to the three main formations there is the Pharaoh in front center, two additional commanders, two units of guard infantry and one unit of Nubian archers.

Each Division has four units of archers, two units of close order fighters, one unit of Nubian archers, one unit of light infantry and 9 units of chariots.  The middle chariot in the front row is the division commander.  There are 176 infantry figures in each division, 18 charioteers plus one standard bearer, 18 horses and the 9 chariots.

The guards have 64 figures plus the 16 Nubians  The Pharaoh and commanders have 12 figures and
one mounted scout plus the chariots and horses.   Total figures painted for this army is 678 figures, 61 horses, and 30 chariots.  Except for the Pharaoh, who I purchased from Baccus, all figures are from Rapier Miniatures.


Friday, February 21, 2020

Scutarii at MWS meeting

Dave Howard and I got together for a game at the MWS meeting on February 16.   The armies were Pyrrhus and Republican Rome.  Keith also participated on my side commanding the left flank.  While Rolf and Frank assisted Dave.     The armies totaled 420 points each.   The Romans had a full consular army of two Roman legions and two Latin Ala totaling 16,800 infantry and 2400 cavalry.   Pyrrhus had 2400 cavalry, 12 Elephants, 14000 Greek and Macedonian phalangites, 4000 Tarantine Phalangites and 1500 mercenaries.

I planned an echelon attack leading with my right flank and having Keith hold back the left flank.   The Romans spread out on the wings of the battle.   Keith was presented with the opportunity of attacking the two Roman cavalry units on his flank with all three of his cavalry units and charged into them.   Unfortunately his die rolls were not effective.   The Romans were able to bring up infantry units to envelop his cavalry and eventually destroy them along with capturing the general commanding them.   This left our left flank in a dangerous position with the Romans having enough troops available to overwhelm it.

On the right flank I was initially successful breaking some of the velites and cavalry opposing me.   However, Pyrrhus and a couple of other cavalry units became embroiled in a fight with several Roman cavalry units.   Eventually both my cavalry and Dave's would be destroyed, but Pyrrhus managed to extricate himself.   One of the elephant units broke and rampaged into my right flank phalanx unit causing little damage before eventually succumbing to wounds.

In the center the legions and the phalanx units were engaged in combat all along the front.  As Roman units became exhausted they were replaced by units from the second and eventually the third line.   The phalanx units were also being worn down.   One of the Tarantine units had become shaken and might have broken in another round or two of combat.   Having broken some of the velites on the Roman left I had a cavalry unit in position to threaten the flank of the Roman center.   the Romans countered by shifting some Triarii to counter this.  Because the Romans had spread their army out they had stripped some of the Triarii from back rank this left them without enough replacement units for the combat in the center.  At this point we called the game.  During the next round of combat several Roman units would have been destroyed and would have likely caused most of the remaining infantry in the center to flee.

The cavalry on both of our flanks had suffered severe casualties, but with the Roman center broken we would have been able to counter any flanking moves by the remaining Romans.  Roman losses were about 5000 or so as we did not have enough cavalry to pursue the 10,000 routers.   Our losses were about 1800 cavalry and several hundred infantry.   A Pyrrhic victory.
 Beginning of game Romans on the far side are advancing.
Our opening move.  On the following turn the phalanx units would move towards the left to more directly confront the Romans.  My right flank cavalry and elephants were heading towards the gap between the legions and the Roman left flank cavalry.  Dave on the right and Rolf on the left. (Photo by Mike O'Brien)

Saturday, January 12, 2019

Gladitaorial Combat.

Sorry, but no pictures.   I got to participate in a Gladiatorial contest today at the South Bay Game Club.   Scott was running the game and Andy, Charles, Dave and I were the owners of the gladiators.

Dave bought an exceptional gladiator and the rest of us bought average ones.   Dave got to roll four 3-sided dice for attribute points and the  rest of us rolled three.   Dave scored 9 with no additional modifiers and I scored 8 with a modifier of plus 1.  Charles and Andy scored less.

The first round had us paired off in individual combats.   I faced Charles and Dave faced Andy.  My first move was a cautious walk forward and to my left.   Dave charged his opponent, scored a fumble and found out his sword was defective.  Andy then struck back and also fumbled dropping his net and trident.   Eventually, Andy was able  to overcome Dave's Samnite.  Charles charged me and after a couple of rounds I defeated him seriously wounding one of his legs and giving him the nickname "Stumpy".   I also had a Samnite and Charles had a gladiator with two swords.

Andy was the victor of that round, while I placed second.  Andy, Dave, and I all earned experience points which we were able to use to attempt to increase our abilities.   I was fortunate with my die rolls raising my size to the maximum of 6 and also adding to two other traits.   The size increase was to play a major part in the following rounds.

The second round had Dave and I paired against Andy and Charles.  Again, I made a cautious move forward and left and Dave advanced forward also,  Andy advanced and attempted to net Dave's Gladiator, but ended up seeing Dave deflect the net causing it to land five spaces to the right rear of Andy's fighter due to a fumble roll by Andy.   While Andy went to retrieve his net, Charles advanced.  I charged Charles and dispatched his Gladiator with a mighty blow to his neck.  A D6 roll of 6 plus my strength of 6 saw his head severed from his body and flying across the arena.   If a hit is scored, how much damage that is done by a sword is determined by a D6 die roll plus the character's strength less any armor protection.  Dave then charged Andy causing some damage and I followed up with a charge of my own knocking Andy's Gladiator down. ending the second round. I placed first and Dave placed second.   I earned an additional five experience points  which I used to increase my sword, shield, and grappling abilities.

The final round was every man for himself.   The first turn, I again moved forward and to my left heading towards Dave's man.   Charles was to my right and Andy was at the opposite corner.   Dave charged Andy for little effect,   Charles came to Andy's aid and attacked Dave from the right flank injuring Dave's right arm and causing Dave to drop his sword.  Dave was netted by Andy and was badly wounded and out of action by the time Charles and Andy were done with him.   While they were fighting Dave and Charles both rolled fumbles.  Dave tripped over his own feet, while Charles was hung over from the night before halving his attributes for the remainder of the contest.  Meanwhile, I continued to walk towards Charles.  We engaged in a brief exchange ending the turn with minor damage to Charles guy and no effect on mine.   I did deliver a blow to his head that was deflected by his helmet.  Andy had advanced, but was not able to make an attack.

 I received an extra card for the second turn.   Anyone being dealt an ace got an extra card for their hand.  Aces are wild cards and may be played as any card during a turn.  Cards are played from King down to two.  Others got an extra card during the first two rounds.  I used my first card to move and attack Andy's gladiator.  He attempted to block my attack with his net and my sword left it in shreds and wounded his left leg.   He lunged at me with his trident piercing my shield and wounding my left arm. I followed this with another attack, but he blocked with his trident causing some damage to my sword, but fortunately not breaking it.   I blocked his next stab with my shield receiving no damage.   I attacked him again with my third card cutting through his right leg and putting him out of action.   For my final card I moved back to Charles cutting through his left leg, causing him to collapse. and ending the combat.  When a hit is scored a D10 is rolled to determine the part of the body hit.  For some reason most of my winning attacks during the contest were leg wounds.  Three of my opponents ended up missing part of a leg.

Scott said that the contest had the most fumble rolls that he had ever seen in any contest.   When fighting both players roll a D10.   A roll of a natural 1 is a fumble causing the player to roll on the fumble table with a  D20.

Thursday, December 13, 2018

Alexander the Great and His Friends "See the Elephant" at Hydaspes

Ran the Battle of Hydaspes at the South Bay Game Club December meeting.   The game did not quite go according to history as the Macedonians were more cautious and the Indians were much more aggressive than they were historically.   Alexander had three pike taxis, the Hypaspists, the Companion cavalry, horse archers, light horse and Agrianians.   The Indians had 120 elephants, 30,000 infantry (some with the elephants), 4,000 horse, and 200 chariots deployed in a symmetrical formation with the infantry ten ranks deep.

Alexander determined who went first each turn.   The Macedonian army's deployment was close to historical with  the majority of the army deployed across from the left end of the Indian army and some cavalry across from the other end.

The Indians opened the action with a general advance by the entire army.  Alexander countered by withdrawing the cavalry from his left back towards the main body of the army.   Eventually the elephants made contact with the Hypaspists and the phalanx.  Alexander's right flank cavalry engaged the chariots and Indian cavalry opposite him after the horse archers had damaged a few units.   The Indian right flank eventually caught up with the withdrawing Macedonian left flank and only with a desperate struggle were the light horse on that flank able to hold as the Indian elephants poured through a gap in the Macedonian line on that flank.

The battle ended with the Companions crushing the opposing chariots and Indian horse though at a cost, while the pikes drove the elephants off and the Agrianians were able to save the left flank by attacking the lead elephant unit from the front and flank chasing it back into the rest of the column.

The game was declared a Macedonian victory as most of the elephants were panicking, the Indian left flank had been destroyed and the main infantry body was starting to crumble with several units of infantry already routing.   The cavalry engagement on the opposite flank was still in doubt, but the penetration of the line by the elephants had been halted.   There was a good possibility that the light horse on the Macedonian left would have broken, but by that time most of the Indian infantry would have also been running.   The game took about an hour and a half to two hours to play.

Macedonian losses were about 50 companion cavalry, 50 phalangtites and hypaspists, and some of the light horse. and agrianians.    Indian losses at the time the game was called over 2000 cavalry, 100+ chariots, over 6000 infantry and about half the elephants panicking.
 Macedonian right wing
 Macedonian left wing

 Turn one.  The Indian army advances with the elephants in front.

 Turn two.  The battle lines approach each other

 The Indian commanders.  Manny in front as one of Porus' sons and Bob as Porus.

 Greg as Alexander, recording the battle.   Planes on sticks monthly game in back.

 Macedonian cavalry roughly handling the Indian left flank.  One unit of companions chasing routing Indian horse at the bottom center.

 Companions work their way through the Indian chariots and cavalry.  Alexander is with his bodyguard just to the upper left of center.

 Indian elephant conga line penetrates into the rear of the Macedonian army.  Outnumbered Asiatic light horse engages Indian cavalry at lower left.  Phalanx units and Hypaspists fighting elephants center and right as Indian infantry looks on.

 Elephant line starts to crumble as Hypaspists drive off the elephants fighting them.

Indian left flank has collapsed.  Mxss of routers lower right.  Elephants are running in all different directions and would eventually cause part of the Indian infantry to also run on the following turn..   Towards the upper center the Agrianians have attacked the lead elephant unit in the conga line from the front and flank causing it to turn and run into the next unit in the line.  One companion cavalry unit would end up in the rear of the Indian army.    Alexander is just to the lower left of center.   Though his bodyguard unit to a couple of casualties he was unharmed.   At least one sub-ordinate general on each side lost their life.


Wednesday, July 25, 2018

Trading and games

A few months ago one of the club members asked about buying a board game I had.  Unfortunately, I could not sell it at a price that was cheap enough for him to purchase.  He has a 3d printer and wanted to know if he could trade printed items for the game.  I thought about it and found a file on line for printing ancient galleys.   this could be sized to fit the various classes of ancient galleys, most of which varied in length from 120 feet to 140 feet.   The file included masts with sails, oars, towers, etc.   We left off the masts and oars as masts were taken down prior to combat and the oars would show up in the top down images that I would mount the ships on.   We put two towers on the larger ships and one on the hexares.   I traded the board game to him for about 600 ships.
Pictured above from left to right 1/1200 metal ships, two 30mm printed ships without towers, a 30mm printed ship with one tower, two 35mm ships with two towers, and one 40mm ship with two towers.  30mm equals about 120 feet which is one of the more common galley sizes.  35mm is about 140 feet which is another common galley size.   40mm is about 160 feet.   There are records of larger sizes, but those are not mentioned in any of the battles and may have been built for prestige only.

Side view of the ships.   The towers have had the top part trimmed off, because they looked too tall with it.  As can be seen ships can be printed with no towers, one tower, or two towers.   The single tower can be in front or back.  Now to add some color to the towers and if I feel ambitious enough, eyes to the front of the ships.  

This left me with all the 2.5D ships that I had made.   Fortunately one of the members of South Bay Game Club was running a Spanish Armada game at the meeting this past weekend.  He was using the paper ships from the Helion publication so I game them to him and he gave me an extra copy of the Armada book in exchange.

All three of us ended up with something we wanted and saved money if we had to purchase the items we got from other sources.   The following are pictures of the various games being run at the South Bay Game Club this past weekend
 PT boat game being set up
Monthly planes on sticks game
 The Spanish fleet at anchor viewed from the edge they needed to escape by.
 Trench warfare skirmish game
 The English fleet arrives behind its fire ships
 The English manage to get amongst the Spanish ships.   The English moved twice as fast as the Spanish and were more maneuverable.   Almost all of the Spanish were able to raise their anchors before the English reached them.   Bill and I managed to sink 38 of them, but they got 50 off the table without their anchors cut for the victory.
General d'Brigade game

Monday, May 28, 2018

May Painting Projects

Got a few projects painted this past month.  I am working my way through the unpainted figures.  Still have quite a ways to go.

216 Hellenistic Zystophoroi.   These are Baccus Prodomoi figures being used for the heavy cavaalry.  They are made with a strip of three different poses.   The middle pose is the same as their Companion figure
 288 Indian Infantry.  These are also from Baccus
 256 ACW Confederate infantry.   Figures are a mix of Baccus and Rapier.   Baccus has two poses in their skirmish pack.   Standing shooting and standing loading with no command figures.  Rapier makes standing shooting, kneeling shooting, standing loading, three different advancing poses, a march attack pose, and three different command packs.
256 ACW Union infantry.   The flags were made by reducing larger scale flags using Paintshop Pro.   Original flags were about 30mm tall at 72 dots per inch.  They were reduced to about 6mm and the dots per inch were increased to 360.  This kept the same level of detail as the originals.

Tuesday, April 17, 2018

Eumenes 2 vs Antigonas 0 part 2

The second game was played on Sunday at the Miniature Wargaming Society of Sacramento.   The first game can be viewed at http://18clovehamhock.blogspot.com/2018/04/eumenes-2-vs-antigonas-0-part-one.html   Gary and Dave commanded Antigonos' army while John and John commanded Eumene's troops.

The armies for both games were as follows.   Where two numbers are shown for number of units this indicates left and right flanks respectively.  The elephants are listed as left, center, and right.  Troop numbers and types are based on the discussion on the Society of Ancients forum from the past year.  In Scutarii ach unit represents about 500 infantry, 300-500 cavalry (300 for this battle) or four to five elephants.  Infantry and cavalry units had two bases each and  the elephants had one base.  the rules do allow for using a single base for cavalry or infantry units.

There are some discrepancies in the number of troops in Diodorus account of the battle.  This was discussed on the Society of Ancients Forum prior to April.  Patrick Waterson suggested a remedy to the difference in the number of cavalry between the overall numbers and the individual unit totals by reducing the formation of 2200 Tarentine cavalry to 200 as there were seldom any great numbers of them and assigning 100 men to the formation that did not have any listed.   There is no mention of light infantry in the account of the battle, but about 20,000 light infantry were provided to Eumenes by his supporters and light infantry are mentioned previously in Antigonos army.   Hellenist armies often provided a light infantry escort for the elephants of 40 to 50 men.   This would require about 3000 of the mercenaries in Antigonos army and account for about 6000 men in Eumenes army.  The disposition of the other 12000 that are estimated to have been present presents a bit of a problem.  If they are part of the elephant screen then they would either extend out past the flanks of the main battle line or form a solid line in front of it.

The players had some leeway in where they deployed their troops other than the phalanx centers.   They had to keep their cavalry units on their historical flanks and the elephants kept their basic groupings of left, center, and right.   The extra light infantry in Eumenes army ended up being deployed to the right of the phalanx in a sixteen rank deep formation, similar to the deployment of the light infantry in the Seleucid army at Raphia.

Under units where there are two numbers that is the number of units on the left and right flanks respectively.  For the elephants the three numbers are for left, center, and right.

Antigonos
UNIT
ATTACK
DEFENSE
MISSILE
MOVE
MORALE
POINTS
UNITS
POINTS
ANTIGONOS
ADD 1
X
X
14"
+/- 1 OR 0
free
1
0
Generals
ADD 1
X
X
14"
+/- 1 OR 0
free
9
0
Bodyguard
5
5
X
12"
11
12
0,1
12
Companion
4
5
X
12"
11
11
7,3
110
Heavy Cav.
3
5
(2")
12", 14"
10
8
5,3
64
Thracian horse
3
4
(2")
12", 14"
11
8
0,3
24
Horse Archers
2
4
4"
12", 14"
11
9
3,0
27
Mercenary horse
3
5
(2")
12", 14"
11
9
0.2
18
Tarantine cavalry
3
5
(2")
12", 14"
11
10
1,0
10
Macedonian phalanx
3
6
X
6"
11
9
16
144
Pantipodoi
3
6
X
6"
10
8
16
128
Mercenary Peltast
3
5
(2")
6", 8"
11
8
12
96
Lycians etc
3
5
(2")
6", 8"
11
7
6
42
Elephamt and Lt Inf escort
4
6
4"
8"
10
13
3,6,7
208
883
Eumenes
UNIT
ATTACK
DEFENSE
MISSILE
MOVE
MORALE
POINTS
UNITS
POINTS
EUMENES
ADD 1
X
X
14"
+/- 1 OR 0
free
1
0
Generals
ADD 1
X
X
14"
+/- 1 OR 0
free
9
0
Bodyguard
5
5
X
12"
11
12
0,1
12
Companion
4
5
X
12"
11
11
6,4
99
Heavy Cav.
3
5
(2")
12", 14"
10
8
1,2
24
Light Cav
3
4
(2")
12", 14"
10
7
2.2
28
Thracian horse
3
4
(2")
12", 14"
11
8
2,0
16
HYP and Silver Shield pike
4
6
X
6"
11
10
12
120
Mercenary Phalanx
3
6
X
6"
11
9
12
108
Pantipodoi
3
6
X
6"
10
8
10
80
Light Infantry
2
4
6"
6", 8"
10
6
24
144
Elephamt and Lt Inf escort
4
6
4"
8"
10
13
10,10,
10
390
1021

This time the Antigonid left flank cavalry was not as aggressive.  The horse archers did move out to the flank and skirmished with opposing cavalry, but the other cavalry remained where it was in the battle line.   The elephants of both armies engaged each other.  On the other flank Antigonos' cavalry was gaining the upper hand and had driven off some of the opposing cavalry.   The opposing phalanxes eventually made contact and after a drawn out fight lasting much longer than the previous game the Silver Shields again routed their opponents.   The rout of the Antigonid center ended the battle with Gary and Dave conceding the game.   Losses for Eumenes were about 1000 with over 15,000 of Antigonos' men routing.   Pictures below.

 Initial dispositions viewed from the hills.
 Antigonos advances with the horse archers at the far end moving to the Eumenid flank.
 Euminid commanders John and John
 Antigonid commanders Gary on left and Dave on the right with an observer.
 The armies advance.
 View from the open flank as mercenaries and elephants make contact.
 View from the hills as the opposing elephants collide and the Antigonid phalanx attacks some of them.
 overview of the battlefield.
 A gap opens in the Antigonid line as some of the mercenaries flee from the elephants.
 The phalanxes clash.
 view from the other side
 Both sides start to take casualties
 view of the battlefield from the hills
 inconclusive fighting on the open flank
 view from behind the elephants and light infantry.  unengaged Antigonid heavy cavalry in right rear of picture.
 Chris joined the game later on the Antigonid side taking over the phalanx.
 Antigonid phalanx in trouble as most of the units become shaken
 another view of the fighting as the left flank of the Euminid phalanx advances to take the place of the elephants that were driven off.  Based on discussions on the Society of Ancients forum where it was noted that other than Magnesia and Zama it appeared to be that elephants would leave usually leave the battle instead of routing, we had them depart if they became shaken during a morale test.
Final view of the battlefield.  Chris had just tested the morale of the phalanx units as once again the Silver Shields routed their opponents..  One unit of the Euminid pantipodoi is routing near the center of the picture, but had no effect on the other units.