Showing posts with label armor. Show all posts

Sunday, April 1, 2018

The battle of marconi

The war between La Union Federal de Buena Vista and La Republica Democratica de los Pueblos de La Cucaracha continues.   A recent engagement occurred at the border town of Carmichael between two brigades of UFBV and two brigades of RDPLC.  Reports from the battlefield are contradictory with both sides claiming victory. 

Forces involved were the 2nd and 9th brigades of the UFBV and the 6th, 9th, and 10th brigades of the RDPLC.  UFBV uses German equipment while RDPLC uses Russian.  The UFBV brigades had only one company each from the engineer and recon regiments.   For organization information and links to both sides forces see  Buena Vista army

This was a meeting engagement between the two modern imaginations and came to a halt when two participants had to leave about four in the afternoon.  It looked like the UFBV was gaining the upper hand, but the RDPLC still controlled more of the towns when we halted.

This was a learning game for us.  We had decided to try Fist Full of Tows 3 to see how it compared to other rule sets we have tried.   The rule book is rather large and somewhat expensive, but it covers everything from post WWI to almost the present day.   With a discount coupon from LULU it costs the same as purchasing both Blitzkrieg Commander and Cold War Commander and a lot less than flames of war..  Much of the book is devoted to equipment data, instructions for how to determine statistics and point values and some organization examples along with ratings for World War II nations and most of the modern day nations.  The rules are well laid out with a basic outline of each rule at the beginning of a section and a more detailed explanation with examples following.   The mechanics of the rules are easily understood and after a turn or two do not require checking the rule book for clarification.   We did not include aircraft for the first game and will be adding additional items as we play further games.
 Start of game. Brian moves his brigade onto the table
 UFBV commanders Hal and Mike move  their brigade on while Chris watches.
 Gary moving his brigade onto the table
  Brian's mechanized battalion takes up a position on the ridge after his advance is halted by UFBV forces.

 DRPLC forces defend positions as UFBV advances.  Chris was able to cause more losses than he received.
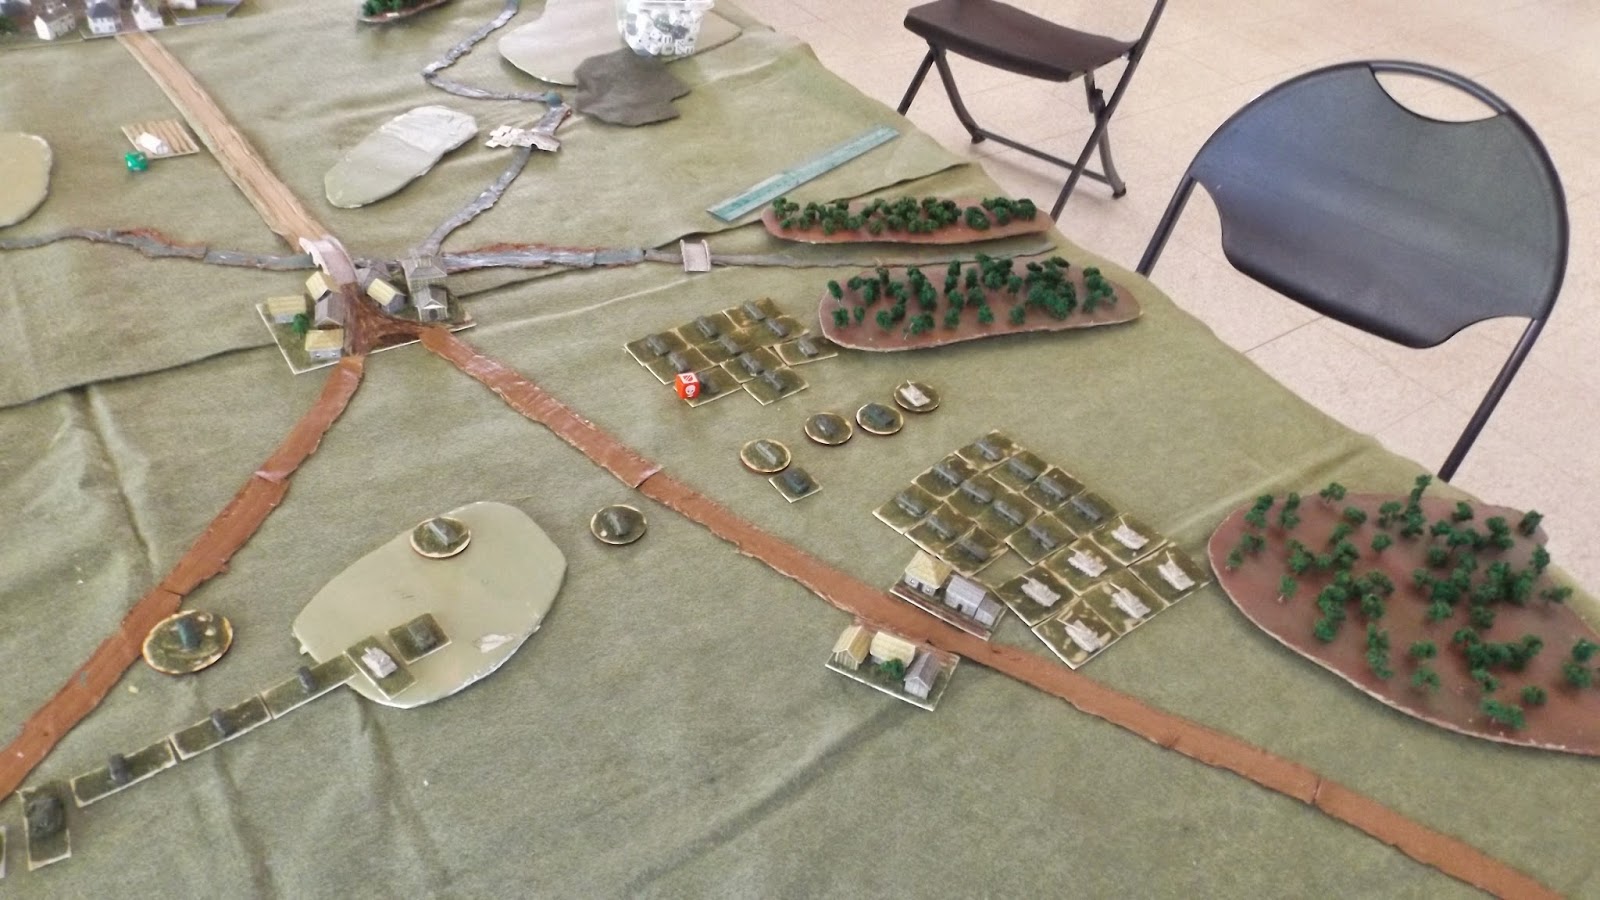
 both sides were able to get troops into the town at the center 
DRPLC tank battalion in center of picture is destroyed by UFBV tanks on hill in the background.

Sunday, April 13, 2014

Putin on the (f)Ritz or Crimea River

I ran a hypothetical (?!) Russian invasion of Ukraine scenario at the South Bay Game Club on April 12th.   The rules were Cold War Commander using my microarmor Russians.   The Russians were attacking against a Ukrainian hasty defense.  Both sides diced for the force they would use.   The Russians were lucky and got the strongest brigade of two tank battalions, one bmp battalion, three btr battalions, and an artillery battalion plus additional brigade assets.   The other two brigades only had five battalions each.   In addition they also had an artillery brigade of three gun battalions and one multiple rocket launcher battalion.

The Ukrainians were not as lucky when they diced for their force.   They ended up with only one tank battalion, one bmp battalion, and one artillery battalion along with the brigade assets.
 
 The commanders from left to right.  Charles Liu, right wing Russian commander.  James Poli, Ukrainian commander.   Dan , overall Russian Commander,   Alan Sissenwen , left wing Russian Commander.
 Looking East from the Ukrainian side.  The game table was 6 feet by ten feet.
View from the South.
View from the North.

The Ukrainians used hidden deployment and had two sets of dummy counters for every real one.   Their forward artillery observer took up a position in the church steeple in the middle of the city.   The Russians used mobile deployment and entered from the east side of the table.   All Russian units made their first command role, but not all made their second.   Charles had a double one for his first btr battalion on his second command role.   Alan scored double ones for two of his battalions.
End of Russian first turn.   The Russians had several preplanned artillery strikes, but they were ineffective, landing on areas where the Ukrainians had placed dummy counters.
Start of Russian second turn.  The Ukrainians had called their artillery down on the Russian right wing on their turn as their only action.
Russian right wing, start of second turn.
End of Russian second turn.   The Russians experienced command control problems during this turn with only half their battalions being able to advance.   Their left wing has reached the river and is preparing to assault across it.  Their left wing artillery has laid a smoke screen across the two hills to its front.
Russian third turn.   Dan advances his brigade assets.
Russian right wing finally advances though it has a massive traffic jam crossing the rivers.
Russian right wing continues its advance.   The Ukrainians have moved an infantry company up to the back of the city.
Russian left wing is held up by fire from Ukraine tank battalion and ATGW company.   On the other flank Ukraine recon elements were able to attack the command elements of the Russian right wing eliminating the FAO for that flank, chasing off one battalion commander, capturing another.  Russian defensive fire was unable to stop the charge of the Ukrainians.
The remains of the Russian bmp battalion advance to the city.   Two thirds of its platoons had been destroyed by Ukraine tanks.   Part of the left wing Russian tank battalion has routed.   The Ukraine tank battalion would cause heavy casualties on the left wing Russian forces for the loss of one third of its tanks.
Charles bypasses the town with his intact tank battalion giving the Russians the victory.   Ukrainian infantry in the town would take out part of the btr battalion.   The remains of the Russian bmp battalion were able to capture the church, forcing the Ukrainian forward observer to flee for his life, seeking shelter with the infantry company.

The buildings are from Paperterrain and Roman seas.   All vehicles are from GHQ.   Infantry is Heroics and Ros.  The railroad track is from Hornby.  Trees from Everest Hobbies on EBAY.  Rivers and some roads scratch built using DAP brown mastic.  Other club games that day were a naval engagement, air combat, bolt action, and Seven Years War.


Tuesday, March 19, 2013

House Rules for Cold War Commander

In the Battle of Montana Libre report I mentioned some modifications to the Cold War Commander rules.   There are a number of reasons for those modifications.   A Nato battalion was expected at times to be defending a 5km front.   Another item that I found on the internet http://www.army.forces.gc.ca/caj/documents/vol_05/iss_4/CAJ_vol5.4_05_e.pdf provided information on company and platoon frontages.   At the 1cm = 20m scale of the rules a battalion would defend a 2.5m(about 100 inches) frontage on the game table.  A company would defend as much as 1.4m(5 feet) and a platoon 60cm(2 feet).  With one stand  representing a platoon this would be almost impossible.
Soviet tactical doctrine is similar and unit frontages are as follows
 http://18clovehamhock.blogspot.com/2012/06/warpac-and-nato-unit-frontages.html


The second item was the difficulty of achieving a kill against modern tanks.  This has been mentioned in a number of posts on the CWC forums.   Modern tanks are difficult to kill.  Especially when a stand represents a platoon instead of an individual vehicle.  However, during the gulf wars allied forces did achieve quite a few kills.   Many of these from air and helicopter strikes, but also from tanks and ifv's.   The Battle of 73 Easterly being one notable encounter.
Also we did not want to have to keep track of the number of hits from turn to turn or make a die roll to see if a stand was knocked out when the number of hits remaining was not enough to knock out a stand.   We considered the hits do be a temporary disruption of the platoon and that the removal of the hits at the end of the turn to be recovery of platoon cohesion.
The following house rules were implemented to allow a battalion to defend a 5km frontage on a reasonably sized game table and to increase the possibility of knocking out tanks.

1)  Ground scale is doubled to 1cm = 40m   A 5km frontage would then be about 1.25m(50 inches or just over 4 feet) on the game table.
2)  Although not mentioned in the rules, the amount of time per turn was doubled keeping movement rates the same.  This was done so that units moved a reasonable distance per turn instead of just creeping along.
3)  Gun ranges were kept the same, but infantry anti-tank, anti-tank missile, and mortar/artillery ranges were halved or adjusted to fit the revised ground scale.
4)  The basic infantry ranges might be adjusted at a later date though as 30cm is about 1.2km at the revised ground scale which is a bit far for most light machine guns.  Though it is isn't too excessive. 
5)  Instead of adding only one die for half range, the number of dice was doubled when firing at half range or less.  This does not apply to infantry weapons,  IATW or ATGM.   This was done to reflect the greater rate of fire for guns and in the doubling of the time scale per turn.  (update infantry range reduced from 30 to 20cm)
7)  ATGM may fire twice per turn, instead of just once, provided they have more than one command activation.
8)  The number of dice for indirect fire has not been modified. During the game neither side was able to call their artillery enough to determine if the number of dice should be adjusted or if indirect fire should be allowed to be called twice during a turn.  The later of the two options might fit better with the doubled time per turn and with the modification to the number of times ATGW can be fired during a turn.  (update - artillery rules kept as written after further games determined that a well placed battalion barrage was quite effective )
9)  Russian tanks firing ATGW can use them at over half range even though their modified ranges are not greater than the range of the gun as they have more attack dice at that range.   With the doubling of dice at half range or less this gives the tank guns more dice when using regular ammunition at those ranges than they would have if they used the missiles.   This would be in keeping with the tactical doctrine for tank gun missiles being used at long range.
10) The command distance modifier was kept at the 20cm modifier of the rules and initiative distances remained the same

All of the above was done in order allow formations to to use tactical doctrine frontages on a reasonably sized table and to avoid modifying as few of the rules in Cold War Commander as possible.  Pete's rules are very good and provide a fun and great game.   Not all of the participants in the Battle of Montana Libre game had experienced the rules before.  Comments were that the rules were very good for representing modern warfare.   One participant who had only been gaming with 20mm figures using Force on Force reported that he had purchased modern GHQ Soviet and British forces after playing the game.

Saturday, March 2, 2013

The Battle of Montana Libre

I would like to thank all the participants who played in the  March 2nd Cold War Commander game at The GameKastle in Fremont.   This was a battle between two fictional Latin American States.   These were Imaginations that I had created a while back.   They are not intended in any way to represent actual nations and the region was chosen for its wide variety of terrain.

The two nations are the Peoples Democratic Republic of La Cucaracha led by El Supremo Jefe Patronus and the Federal Union of Buena Vista ruled by President for Life Elvis Narcisso.   La Cucaracha uses Warsaw Pact and Chinese equipment while Buena Vista uses a variety of Nato and Israeli equipment.

There were five players in addition to myself.   Since none of the initial arrivals had previously played the rules we fought a meeting engagement.   There were a number of house rules and modifications to the basic rules.   The ground scale and time per turn were doubled, but movement and most of the weapon ranges were kept the same.   ATGW and IATW had their ranges halved, but ATGW vehicles can fire twice in a turn instead of just once provided they get more than one activation.   Instead of adding one die at half range the number of dice was doubled except for ATGW/IATW.  This was done to speed up the game and to make it more possible to knock out tanks.  Some of the armor and save values were also modified.   See http://18clovehamhock.blogspot.com/2013/02/cold-war-commander-hits-and-saves.html for the number of dice needed to have an average chance of knocking out units with various save and hits.  The post also has a link to a site with data that I used to modify some of the hit/save numbers for some vehicles.  A number of western IFV's and tanks have had armor upgrades that allow them to have saving throws vs ATGW and IATW.   Even with the long range missile advantage of the T90 tanks the La Cucaracha players sought to close to half range in order to have a better chance of knocking out the Leopard 2A6's of the Buena Vista army..

The table area was 6 feet across by 7 1/2 feet wide or 7.2km by 9km.

La Cucaracha was faster at deploying so got to move first each turn.    Their forces consisted of the 1st Motorized Infantry Brigade (re-enforced) and the 3rd Tank Brigade.   These were chosen by a random draw prior to the start of the game by the first two players on the La Cucaracha side from a selection of 8 different brigades.   The Buena Vista forces were the brigade equipped with West German Vehicles.   When Manny showed up he joined the La Cucaracha side and an additional CO unit was provided for the 1st Brigade troops.   The 1st Brigade had two tank battalions, one BMP battalion, three BTR battalions, one 122mm SP artillery battalion and some brigade troops.   The 3rd Tank Brigade had three tank battalions, one BMP battalion, one 122mm SP artillery battalion, and brigade elements.   There was the possibility that there would be additional artillery and air support, but the die rolls for those were unsuccessful.  After die roll adjustments the air superiority rolls were equal.  The Buena Vista forces also failed their die roll to get additional artillery support

The Buena Vista forces were two tank Battalions, one Puma battalion, one Boxer battalion, two artillery battalions, and various brigade troops.   The Buena Vistans had two brigade groups and were able to distribute the companies and platoons amongst the various HQ as they saw fit.

The La Cucaracha army entered from the north side of the table with the 3rd brigade on the right and the 1st brigade on the left and center.   The first brigade's advance eventually bogged down as casualties mounted.  The right wing Buena Vista battle group decimated the BMP battalion.   There were a couple of turns were the initial command roles for some of the La Cucaracha 1st Motorized Brigade battalions failed and they were unable to move forward.   Only one blunder was rolled during the game.   This had little effect as only one platoon of the center tank battalion on the La Cucaracha side had to retreat.

On the other flank the La Cucaracha 3rd brigade started out with a slow advance, but then scored several activations in a row and quickly assaulted the hill and village on the west end of the table.   The 3rd gave as good as it got losing 5 platoons, but knocking out 5 of their opposing platoons.   After four hours the game was called as several of us had to be heading home.   The game was judged a minor victory for the forces of La Cucaracha as they had a strong superiority in numbers on the 3rd brigades flank and were likely to break through on the western edge of the battlefield.   There was little possibility of either side making further headway in the center or eastern side of the battlefield, though it was possible for a company of Buena Vista Leopard tanks to be sent from the eastern part of the field to the west.

 Buena Vista Army12800 points not counting special artillery munitions
2 CO (CV10)
16 HQ (CV9)
2 FAO (CV8)
1 Recce Unit (Luchs/Lynx)
24 Infantry Unit (Regulars)
24 Infantry Upgrade (Armbrust)
2 Support Unit (Mortar, 107mm, M106)
12 IFV Boxer
12 IFV Puma
6 ATGW Unit (TOW, Jaguar 2)
6 Artillery Unit (155mm, M109)
24 Tank Unit (Leopard 2A5)

La Cucaracha 1st Motorized Brigade (re-enforced) 10185 points
 
1 CO (CV9)
6 HQ (CV8)
1 FAO (CV6)
3 Recce Unit (BRM-1)
36 Infantry Unit (Conscripts)
36 Infantry Upgrade (RPG-29)
9 IFV Unit (BMP-2)
12 Tank Unit (T-90)
3 ATGW Unit (AT-5 Spandrel, BRDM)
1 Air Defence Unit (AA, ZSU-23-4 + SA-16)
1 Air Defence Unit (SAM, SA-8/9/13)
3 Artillery Unit (122mm, 2S1 M1974)
27 Transport Unit (BTR-80)

 La Cucaracha 3rd Tank Brigade 8310 points

1 CO (CV9)
4 HQ (CV8)
1 FAO (CV6)
3 Recce Unit (BRM-1)
9 Infantry Unit (Conscripts)
9 Infantry Upgrade (RPG-29)
9 IFV Unit (BMP-2)
18 Tank Unit (T-90)
3 ATGW Unit (AT-5 Spandrel, BRDM)
1 Air Defence Unit (AA, ZSU-23-4 + SA-16)
1 Air Defence Unit (SAM, SA-8/9/13)
3 Artillery Unit (122mm, 2S1 M1974)

The La Cucaracha army totalled 18,495 points not counting special artillery munitions.
Photos of the game follow
View of the battlefield from the south end of the table.
Dan in blue shirt who stopped by and the first three to show up for the game.  Gregg and Manny would arrive a bit later
Start of the battle La Cucaracha army arrives.
First turn.  La Cucaracha 3rd Tank Brigade advances.
Arrival of Buena Vista armed forces.
End of first turn.  Buena Vista infantry has occupied the city, while Leopards advance forward.
Lead battalion of La Cucaracha 3rd tank brigade advances towards stream.
South end of battlefield.   BTR battalion takes cover behind woods as tank battalion takes losses.
The south end of the battle.  Fight for the hills.  Hidden behind Gregg's hands is a hill with a Leopard company on it.  This company would have the worst hit record of the battle.
BMP battalion of 1st brigade getting shot apart.
Same area.  The BMP battalion would lose 2/3rds of its strength in a couple of turns.
The fight for the hills intensifies as both sides take losses.  Initial assault by BMP battalion against town is thrown back.  Manny's attack with the 3rd Brigade would tip the game in favor of the La Cucaracha armed forces earning them a minor victory.
The remains of the BMP battalion.  The battalion commander, Colonel N. Harwood, would be demoted to a desk job.
1st Motorized Brigade advance stalls with half the tanks in the left tank battalion destroyed.
View of the city occupied by Buena Vista infantry.   End of the game

Sunday, February 10, 2013

1944 Eastern Front Scenario

In January I ran a 1944 Eastern Front scenario using Blitzkrieg Commander at the GameKastle in Fremont.   This was a Russian Mechanized Corps assault against an entrenched German defense.   Russian forces followed a set schedule of appearance while the Germans drew their forces from a selection of predetermined forces.   The two front line battle groups were KG Gerbel and a Falschirmjager battalion.  The second line was KG Sturm.   Surprisingly, KG Sturm has been drawn by the Germans in each of the games that i have run.  John Leary and Tibor Ipavic commanded the Germans, while I helped Dan with the Russians.

The Germans started in entrenched positions using hidden deployment.  They also had several minefields.   Each battalion had an off-table 105mm battery in support and there was an off-table 155mm battery that either battalion could call.  The Russians had nine batteries of 75mm artillery, 9 batteries of 120mm mortars, and two batteries of 122mm rocket launchers.   The 75mm guns had two turns of smoke assets and eight turns of high explosive assets.   The mortars had ten turns of high explosive assets.  The rocket launchers had four turns of high explosive assets and could only fire every other turn.   Some of the Russian artillery fire was able to damage the German defenders, but much of it fell on empty ground.   The major town in the German rear was reduced to rubble though the German reserves near it were not affected.

A while back I created several fictional battle groups for Blitzkrieg Commander.   Each of these battle groups has a composition that will vary somewhat from year to year.  The Germans have about 10 different battalion sized formations, including a falschirmjager battalion, a panzerjager battalion, a panzer battalion, a recon battalion, a motorized/panzergrenadier battalion, an understrength infantry battalion, a volksgrenadier battalion, and several mixed composition kampfgruppes.  The Russians also have several different formations they can choose from.  These include two infantry brigades/regiments, two tank brigades, a heavy tank brigade/regiment, a group of assault gun battalions, and some miscellaneous formations.

The initial Russian force was the 2nd infantry brigade.   This was divided into two equal sized formations of two battalions each by adding a second CO and a second infantry gun, and replacing the 120mm mortar with an 81mm mortar.  The initial Russian attack made slow progress, averaging just over one activation per turn per infantry battalion.  The two battalions in the center were barely able to make one activation per turn while the two flanking battalions outpaced the center ones.   Dan's right flank battalion took heavy casualties as it advanced on the hill in front of it.  The arrival of the assault guns on turn four helped and Dan was able to clear the Germans from the hill.

Both sides did roll a couple of blunders, but they had little effect or actually helped..

On the Russian left their lead infantry elements started making contact with the falschirmjagers.   Both sides blazed away at each other to little effect.   We had reached turn eight, but had to end the game as two of the players had previous engagements they had to attend.

Dan provided the hills and the fields.   The buildings are from PaperTerrain  http://www.paperterrain.com/ and are from the north Russian set and European set.   Infantry and anti-tank guns are from Heroics and Ros while vehicles are all GHQ
Map of the battle.
Dan waiting for game to begin.
 Tibor survey's the deployment of KG Gerbil.
 John deploys the falschirmjagers.
 Initial Russian right flank advance
First turn of the battle.
 The Russian left flank advances
 The fight for the hill

 Center of the Russian advance.  Russian assault guns have arrived and the right flank battalion is attacking the German defenders on the hill
Russians advance towards falschrimjager positions
 Russian assault guns pound the German defenders on the hill.
 Russian left flank advances into the woods making contact with the falschirmjagers.
A listing of the units that made onto the table is given below.   The anti-tank guns and IS2's in the last Russian formation were due to arrive later.   The Germans also had an additional off-table battalion available as re-enforcements.  The Russians had another three infantry battalions, seven tank battalions and two smg battalions available along with the IS2's and anti-tank guns.
 
KG Sturm Late War
Quantity Troops Arm Move AT AP Assault Hits Save Cost
1 CO (CV9) CMD 60 - 3/30 - 6 6 120 [120]
4 HQ (CV8) CMD 40 - 2/30 - 4 6 60 [240]
1 FAO (CV7) CMD 40 - - - 4 6 30 [30]
7 Infantry Unit (Heer) INF 10 - 4/30 4 6 - 50 [350]
4 Support Unit (MG, MG-34/42) INF 10 - 3/60 2 5 - 40 [160]
3 Support Unit (Mortar, 81mm) INF 10 3/120 3/120 2 5 - 75 [225]
3 Support Unit (Mortar, 120mm) INF - 5/120 5/120 2 4 - 100 [300]
2 Panzer Unit (Pzkpfw VI, Tiger I) ARM 20 5/100 3/100 4 6 4 230 [460]
1 Assault Gun Unit (StuG-III, 75mm lang) ARM 20 4/80 3/80 3 4 5 135 [135]
7 Transport Unit (Half-Tracks) TRN 20 - - - 3 - 15 [75]
10 Transport Unit (Trucks) TRN 20 - - - 3 - 15 [150]
AT: Anti-Tank, AP: Anti-Personnel, R: Restricted, O: Open
Tactical Doctrine
Flexible tactical doctrine (25cm initiative distance; HQs may issue orders to units in other formations without penalty)
Special Rules
-1 modifier to die roll for air superiority until September 1944, -2 modifier after that
Infantry units may receive two upgrades each (Panzerfaust and Panzerschreck)
Infiltration: +1 to command value for flank deployment
Note 1. Panzer Unit (Pzkpfw VI, Tiger I)
Tough: Flank hits do not reduce armour save
Note 2. Transport Unit (Trucks)
May transport one infantry or infantry support unit, or may tow one gun
Summary
Breakpoint 10
2275 points 

Gerbel (November 1944)
Quantity Troops Arm Move AT AP Assault Hits Save Cost
1 CO (CV9) CMD 60 - 3/30 - 6 6 120 [120]
5 HQ (CV8) CMD 40 - 2/30 - 4 6 60 [300]
2 FAO (CV7) CMD 40 - - - 4 6 30 [60]
3 Infantry Unit (Heer) INF 10 - 4/30 4 6 - 50 [150]
5 Infantry Unit (Fallschirmjaeger) INF 10 - 5/30 5 6 - 70 [350]
2 Infantry Unit (Heer, conscript) INF 10 - 3/30 3 6 - 30 [60]
3 Support Unit (MG, MG-34/42) INF 10 - 3/60 2 5 - 40 [120]
2 Support Unit (ATG, 75mm, Pak-40) INF 5 4/80 3/80 2 4 - 105 [210]
5 Support Unit (Mortar, 81mm) INF 10 3/120 3/120 2 5 - 75 [375]
1 Support Unit (Mortar, 120mm) INF - 5/120 5/120 2 4 - 100 [100]
2 Support Unit (IG, 75mm, le.IG-18) INF 10 2/40 3/80 2 4 - 80 [160]
4 Panzer Unit (StuG-III, 75mm lang) ARM 20 4/80 3/80 3 4 5 135 [135]
4 Transport Unit (Trucks) TRN 20 - - - 3 - 15 [60]
AT: Anti-Tank, AP: Anti-Personnel, R: Restricted, O: Open
Tactical Doctrine
Flexible tactical doctrine (25cm initiative distance; HQs may issue orders to units in other formations without penalty)
Special Rules
-1 modifier to die roll for air superiority until September 1944, -2 modifier after that
   Infantry units may receive two upgrades each (Panzerfaust 65 pts. and Panzerschreck 50 pts.)
   Infiltration: +1 to command value for flank deployment
Note 1. Infantry Unit (Fallschirmjaeger)
Elite: No command penalty for assaulting the enemy and deduct one die when rolling for suppression/fall-back
Note 2. Infantry Unit (Volkstuurm)
Green.  May not use initiative to aqssault. Add one die for fallback/suppression
Note 3. Transport Unit (Trucks)
May transport one infantry or infantry support unit, or may tow one gun
Summary
Breakpoint 15
5th FallschirmJaeger (June 1944)
Quantity Troops Arm Move AT AP Assault Hits Save Cost
1 CO (CV9) CMD 60 - 3/30 - 6 6 120 [120]
3 HQ (CV8) CMD 40 - 2/30 - 4 6 60 [180]
1 FAO (CV7) CMD 40 - - - 4 6 30 [30]
7 Infantry Unit (Fallschirmjaeger) INF 10 - 5/30 5 6 - 70 [490]
1 Support Unit (MG, MG-34/42) INF 10 - 3/60 2 5 - 40 [40]
1 Support Unit (ATG, 75mm, Pak-40) INF 5 4/80 3/80 2 4 - 105 [105]
4 Support Unit (Mortar, 81mm) INF 10 3/120 3/120 2 5 - 75 [300]
1 Support Unit (IG, 75mm, le.IG-18) INF 10 2/40 3/80 2 4 - 80 [80]
14 Transport Unit (Trucks) TRN 20 - - - 3 - 15 [210]
AT: Anti-Tank, AP: Anti-Personnel, R: Restricted, O: Open
Tactical Doctrine
Flexible tactical doctrine (25cm initiative distance; HQs may issue orders to units in other formations without penalty)
Special Rules
-1 modifier to die roll for air superiority until September 1944, -2 modifier after that
Infantry units may receive two upgrades each (Panzerfaust and Panzerschreck)
Infiltration: +1 to command value for flank deployment
Note 1. Infantry Unit (Fallschirmjaeger)
Elite: No command penalty for assaulting the enemy and deduct one die when rolling for suppression/fall-back
Note 2. Transport Unit (Trucks)
May transport one infantry or infantry support unit, or may tow one gun
Summary
Breakpoint 13
1555 points 

Russian Army, Late Eastern Front (July 1944)

Quantity Troops Arm Move AT AP Assault Hits Save Cost Notes
1 CO (CV8) CMD 60 - 3/30 - 6 6 90 [90]
4 HQ (CV7) CMD 40 - 2/30 - 4 6 30 [120]
2 FAO (CV6) CMD 40 - - - 4 6 15 [30]
32 Infantry Unit (Regulars) INF 10 - 3/30 4 6 - 40 [1280]
8 Infantry Unit (SMG Troops) INF 10 - 6/10 5 6 - 65 [520] #1
8 Support Unit (MG, Maxim) INF 10 - 3/60 2 5 - 40 [320]
3 Support Unit (Mortar, 82mm) INF 10 3/120 3/120 2 5 - 75 [225]
2 Support Unit (Mortar, 120mm) INF - 5/120 5/120 2 4 - 100 [200]
1 Support Unit (IG, 76mm) INF 10 2/40 3/80 2 4 - 80 [80]
3 Transport Unit (Trucks) TRN 20 - - - 3 - 15 [45] #2
AT: Anti-Tank, AP: Anti-Personnel, R: Restricted, O: Open

Tactical Doctrine
Rigid tactical doctrine (15cm initiative distance; +1 to the CV if all units under command carry out the same action; add one to the breakpoint per 1000 points; HQs can only issue orders to units in their own formation)

Special Rules
+1 modifier to die roll for air superiority until September 1944, +2 thereafter on the Eastern Front, full air superiority in the Far East


Note 1. Infantry Unit (SMG Troops)
Tank Desant: May be carried on one tank unit
May not receive any infantry upgrades
LMG: 1/30 attack against soft-targets
Note 2. Transport Unit (Trucks)
May transport one infantry or infantry support unit, or may tow one gun
Summary
Breakpoint 30
2910 points 
Russian Army, Late Eastern Front 

Quantity Troops Arm Move AT AP Assault Hits Save Cost Notes
1 CO (CV8) CMD 60 - 3/30 - 6 6 90 [90]
1 HQ (CV7) CMD 40 - 2/30 - 4 6 30 [30]
1 HQ (CV8) CMD 40 - 2/30 - 4 6 60 [60]
1 Support Unit (Anti-Tank Team) INF 10 2/20 1/30 3 6 - 50 [50] #1
8 Heavy Tank Unit (IS-2) ARM 20 6/80 5/100 4 6 4 245 [1960] #2
4 Assault Gun Unit (SU-76) ARM 20 2/40 3/80 2 3 6 80 [320] #3 R/O
2 Assault Gun Unit (ISU-122) ARM 20 6/80 5/100 4 6 4 235 [470] #6 R
4 Assault Gun Unit (ISU-152) ARM 20 6/60 6/100 4 6 4 240 [960] #7 R
3 Anti-Tank Unit (ATG, 76mm) AT 5 3/60 3/80 2 3 - 85(255)
3 Anti-Tank Unit (ATG, 57mm) AT 5 3/60 2/60 2 4 - 75 [225]
4 Anti-Tank Unit (SPAT, SU-85) AT 25 4/80 3/80 3 5 5 145 [580] R #4
3 Transport Unit (Trucks) TRN 20 - - - 3 - 15 [45] #5
AT: Anti-Tank, AP: Anti-Personnel, R: Restricted, O: Open

Tactical Doctrine
Rigid tactical doctrine (15cm initiative distance; +1 to the CV if all units under command carry out the same action; add one to the breakpoint per 1000 points; HQs can only issue orders to units in their own formation)

Special Rules
+1 modifier to die roll for air superiority until September 1944, +2 thereafter on the Eastern Front, full air superiority in the Far East


Note 1. Support Unit (Anti-Tank Team)
Double the number of attacks against AFVs in close assault
Note 2. Heavy Tank Unit (IS-2)
Tough: Flank hits do not reduce armour save
Note 3. Assault Gun Unit (SU-76)
No Machine Guns: No bonus for firing at soft-targets
Note 4. Anti-Tank Unit (SPAT, SU-85)
No Machine Guns: No bonus for firing at soft-targets
Note 5. Transport Unit (Trucks)
May transport one infantry or infantry support unit, or may tow one gun
Note 6. Assault Gun Unit (ISU-122)
Tough: Flank hits do not reduce armour save
No Machine Guns: No bonus for firing at soft-targets
Note 7. Assault Gun Unit (ISU-152)
Tough: Flank hits do not reduce armour save
No Machine Guns: No bonus for firing at soft-targets
Summary
Breakpoint 13
4790 points