Tuesday, December 31, 2019

End of Year Gaming

I haven't  posted for the last couple of months.   During that time I have participated in a several games,  run a couple at the conquest Avalon convention and painted some additional items.

At Conquest Avalon I spent Saturday gaming, taking part in a French and Indian War game using Rank and File which ended in a draw,  a Ridiculous Vanity game where my king charged the opposing commander and due to an extremely unlucky set of die rolls ended up dying,  and a KISS Rommel game commanding the British at Toburk.    The British were overrun.  On Sunday I ran a Franco-Prussian War game using 1871 rules.   This was two Prussian line corps vs a French four division corps which was a draw.

I also ran a Franco-Prussian war game at the Miniature Wargaming Society of Sacramento using Bloody Big Battles this was Prussian victory.  Of the two rule sets 1871 played better, but was not that satisfying a game.   I will be trying Rank and File for a Franco-Prussian War game in 2020.

After trying KISS Rommel, I went looking for a better set of rules for large scale battles.  I found the turn sequence for KISS Rommel which had the moving side doing all the firing with no return fire from the defending side to allow one side to gain a distinct advantage.  The Tobruk game used a die roll for initiative.   On one turn the Germans chose to move second, moved up to range and attacked the British causing a few casualties and removing some of the defensive works and mine fields.  On the following turn they again won the initiative, moved first this time and took out more of the defenders, while breaking through the defenses.   At this point there were not enough British left to stem the German tide.

The last game of the year was a fictional lace wars game set in H. Beam Piper's Lord Kalvan of Otherwhen universe.   I again commanded the Ilter army.   The scenario was from the Wargame scenario book.   We got to choose seven units from the list of forces available,  I choose a heavy cavalry unit, five infantry units, and the two artillery piece unit.   The opposing side chose the two artillery piece unit and six infantry units one of which was light infantry.   Both sides got to designate one of their units as veteran and would use a die roll to determine which of the other units was raw.   I choose on of the infantry units to be veteran as did our opponents.  Both sides die rolls resulted in one of the other infantry units being raw.   Both sides had two subordinate commanders.  One of them was aggressive and the other was not willing to follow orders.   I did not know what they were like as Mike, the gamemaster told them in private prior to the start of the game.

We started the game in road column with one unit on the table and the rest following behind.  Fortunately my aggressive commanders units were the second command in the column and my insubordinate commander was the last in line.   I lead with the heavy cavalry, followed by the grenadiers.   The other two commands had two infantry units and one of the two guns.

We won initiative for the first turn and my cavalry quickly headed down the road and turned left at the junction.  The Grenadiers and the next command followed.   The third command headed off the road to the right to secure our right flank.

On the second turn my cavalry moved into position to threaten the flank of the lead two infantry battalions.  The opposing side had occupied the village with another of their infantry units, had another marching behind the village and woods to their right flank, had the two guns occupy a hill to the left of the village and had the other two infantry in front of the guns.   My grenadiers move up to the central inn at the junction.  The second command deployed the gun to the right of the inn and moved up the infantry just to the left of the grenadiers with the lead battalion on the hill.  The third command move up and deployed its gun and infantry on the right on the following turn. Due to their guns being deployed back on the hill they were firing at long range while ours were firing at intermediate range with twice the effectiveness of theirs.

On the third turn the enemy's lead battalion charged my grenadiers.   The fire from my grenadiers was not enough to halt the charge and a bloody fight ensued for control of the inn.  Both sides lost half their men and my grenadiers were forced back.  Meanwhile my cavalry charged the second battalion of infantry and routed it.   On the following turn the cavalry again charged causing that unit to run further and then hitting the enemy grenadiers in the flank routing them.    Over the course of four turns Princess Gwendolyn's regiment of horse would engage in the two charges and come under fire multiple times from the enemy's infantry.  They were able to extricate themselves from that situation and move to the left flank of our aggressive commander's infantry with only one of six bases having been lost.

Our aggressive commander had regained control of the inn and the survivors of the grenadier battalion moved up to occupy it.  While all this was happening our right flank and guns had been engaging  in a fire fight with their opposites.

The enemy's aggressive commander was the one opposing ours.   One of his infantry units charged ours on the hill and was thrown back.  This set up the situation where our infantry unit and the heavy cavalry would be able to make a joint charge into the unit that had been thrown back.  Our artillery and musket fire caused one of the infantry units in the center of their line to loose over half its men and rout.   One of our gun crews had been driven from their guns by the enemy artillery, but was able to return to their gun the next turn. Our right flank command had taken some losses during the exchange of musket and artillery fire.

At this point the game was called  as a victory for our side.  with three of the opposing infantry units having fled the battle.   Our grenadiers were at half strength and only good for occupying the inn or defending.   One unit of infantry on both sides were still at full strength.   All the other infantry on both sides had taken casualties, but were still effective.  With the game called we were not able to make the combined cavalry and infantry charge we had set up.   A lucky result for us would have seen a fourth enemy unit routed and destroyed.  

The following pictures were taken by Mike, our game master.
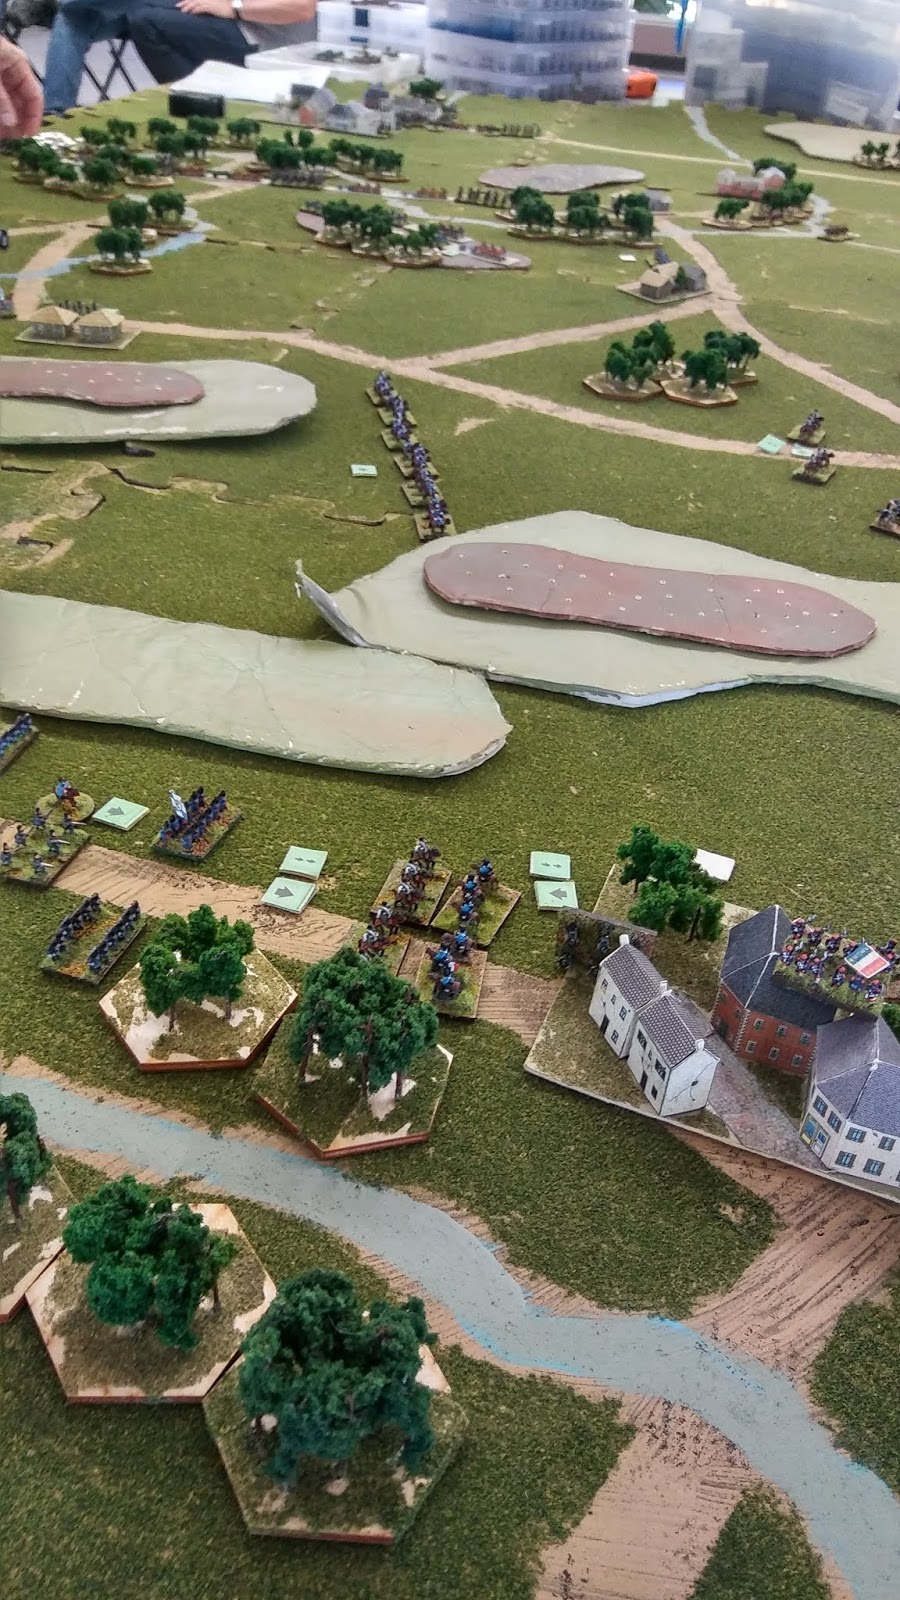
 End of the first turn.  My cavalry on the road at the bottom.
 Turn three charges by our cavalry and their infantry at the inn in the middle
 Turn four the cavalry continues charging into the flank of the opposing grenadiers.
 Another view of turn four.
 End of game our cavalry and infantry are preparing to charge.
 End of game from behind the other army
.End of game.   Our army is on the left and the other is on the right.  The unit at the bottom of the picture is their grenadiers who had recovered from being broken by our cavlary.  Our right flank had fallen back due to casualties, but was still in good order.  Their guns are on the hill at the bottom right and their other two infantry units are to the right center with one on the road and the other at the base of the hill.  The unit on the road would have taken fire from both our guns, the grenadiers and the second line of infantry on the hill for a total of 12 dice  while the cavalry and the first line would have charged the unit at the base of the hill.  While it was not guaranteed there was the chance that both of those units would have broken.


Monday, October 21, 2019

Franco-Prussian game at South Bay Game Club

We played a fictional encounter between a four infantry division French Corps against a Prussian and a Bavarian corps  using the 1871 rules by Bruce Weigel.   The French were the victors.   The scenario needs to be better balanced due to the lower morale of the Bavarians.   Either the Bavarian corps should be replaced with another Prussian corps or if they are used the Prussian corps should be the Prussian guard corps.   The French a total of six Turco and Zouave regiments which are higher rated morale than French and Prussian line regiments.  Chris provided the Baccus 6mm troops for the game.  I provided the scenery.  
 View from the south.   French advancing on a broad front. 
 View from the north.  French left flank engages Bavarians. 


 French road column advancing. 
 Prussians take up positions in town at top of picture. 
 Prussian cavalry regiment guards ford in center of picture. 
 Prussian columns advancing. 
 French and Bavarians engage.  French cavalry division at top defeats Bavarian cavalry. 
 French regroup and consolidate their position. 
 Prussians marching along the road. 
 French (on the left) are slowly pushing back the Prussians.  
 French (on the right) continue to wear down the Bavarians. 
 French attempt to storm the hill and will be driven back.   
 Prussians under pressure on their right and left.

Saturday, September 28, 2019

Franco-Prussian War Project Part Seven


I finished painting and basing all the baggage wagons and limbers and I am in the process of adding the flags I printed to both armies.   The Prussians have been finished and the French are about one-third completed.   This will be finished this weekend, leaving only flocking the bases as I have time.  The armies will have their first outing at the South Bay Gaming Club meeting on the second weekend of October.

I used some flags I found on the Warflag website and others from the L'Armee de Napoleon III book.  Paintshop Pro is the graphics program I used to reduce them to the proper size for the figures.    This program allows me to keep the detail of the flags as they are reduced in size.  As an example of how this is done I will use an original image that is 25mm from the bottom of the flag to the top and has a resolution of 72 dots per inch.  It will be reduced to a height of 5mm which is one-fifth of the original.   In order to keep the detail from becoming blurred I multiply the dots per inch by a factor of five, which is the reciprocal of one-fifth, resulting in a resolution of 360 dots per inch.

After reducing and saving them to a folder on my computer, I then copied them into a word document.   The images were copied as many times as needed with some extras.   After cutting them out they were folded and glued to the cast flags of the figures.

Below are pictures of the printed flags.   These are all about 5mm tall.  The first picture shows almost the entire set of printed flags.   All German flags are from the Warflag website. From top to bottom there is Bavaria, Saxony, Baden, Wurtemberg, Hesse, Prussian cavalry, Prussian infantry,   French flags from Warflag,  and French flags from the L'Armee book.  I kept the guard flags separate from the others at the bottom


The next two images are closeups that I hope show the detail of the flags.


Thursday, September 19, 2019

Franco-Prussian War project part six

Finished painting and basing the French line cavalry yesterday.   I ended up with more than I had originally intended to.   While I was doing the Germans I realized that I had forgotten to include the army reserve artillery.  I also found a few more figures in my collection that I had previously missed.  Fortunately I came across an Ebay listing for 13 packs of French infantry, cavalry and artillery and was able to win them at the minimum bid price.  This, with shipping, was still less than purchasing the additional infantry and guns that I needed.  The additional cavalry also allowed me to put six figures on each cavalry base instead of the five that I would have had to do previously.  I still ended up with eight more units of cavalry than I had planned.

The entire French army now consists of the Guard Corps and ten infantry divisions in three line corps.   There is a cavalry division in each of the corps and enough for the three reserve cavalry divisions.  The purchase also allowed me to replace the ACW Zouaves that I was using for the guard Zouaves.

The additional figures I came across in my collection also added enough to increase the Prussian infantry divisions to seven.   I will eventually purchase some additional infantry and guns to add an eighth infantry division making three Prussian line infantry corps, the Prussian Guard corps, a Bavarian corps, and two reserve cavalry divisions..  This will be just about enough to do Mars-la-Tour.  

The picture below has the cuirassiers, chasseurs and hussars in the left column from front to back and the dragoons and lancers in the right column.  In 1868 new uniform regulations were issued for the line cavalry.   The dragoons would keep their helmets, but would be changing their green tunic for a dark blue one.   The lancers, hussars, and chasseurs would all exchange their head gear for red kepis.   The Hussars and chasseurs would exchange their traditional uniforms for a blue tunic that was lighter than the dragoons and cuirassiers.   This change was only partially implemented by 1870.   Le Armee de Napoleon III shows all kinds of combinations of uniform pieces in the various cavalry regiments.  Hussar regiments are shown in their traditional uniform colors with both the red kepi and their original head wear.   I decided to paint the chasseurs and dragoons in a mix of units that have some in their new uniforms and some in their old uniforms.   One regiment of lancers has the red kepi.  The figures are actually Rush's lancers from the ACW range that I had spares of.

This only leaves limbers, wagons, and generals to finish painting and flags to add to the units.

Wednesday, September 11, 2019

Franco-Prussian War Part Five

Finished the French infantry.   Still have the French cavalry and Generals and the baggage to complete.   Below are the final five divisions consisting of a total of 960 infantry.   Troops are based on 1.5 inch by .75 inch bases (38mmx19mm) with 16 figures per base.   These are for the 1871 rules where each base represents a battalion.  All figures are Heroics and Ros.

Friday, September 6, 2019

Franco-Prussian War Project Part 4

Completed the French Imperial Guard, all the foot chasseur battalions and the artillery.   This was 72 cavalry, 380  infantry, five artillery pieces, 2 miraellueses, and 33 gunners for the guard.  112 chasseurs, 30 guns and 10 mitrrailleuses, and 188 gunners for the line.

I still have about 1000 French infantry, along with the French line cavalry, and wagons to finish.  The French cavalry takes longer to paint than the Germans due to additional colors and items to paint along with reversed colors for the musicians.

The photo below is the guard and chasseur battalions.   Voltigeur division at the top, Grenadier and Zouave division next, and the cavalry division at the bottom.  The chasseurs are at the top right and the guard corps artillery reserve is below.

Sunday, September 1, 2019

Pacificon

Made it to Pacificon on Saturday.  There did not appear to be as many miniature or board games as last. year.   Nor did there seem to be as many people participating either.   There were quite a few Command and Colors games at the convention this year covering ancients, Napoleonics, ACW, and WW2

My first game may have been too early in the day as  no one signed up to play.  Fortunately the same set up was being used for the second game which had a full complement of players.  There were several other early games that had one or maybe two players where the gamemaster had to step in and play.

Below are some pictures of other games at the convention.   I was not able to get pictures of all of them.

Retreat From Moscow 1812 with 54mm figures.
Battle of Anzio in 15mm using Battleground rules.

Battle for Hoth using modified Bolt Action rules.  28mm
WW2 escape from Falise in 15mm using Fireteam
Western gunfight using Desparado rules.

This was the smuggler scenario with four factions.   The smugglers whose objective was to meet with a local gang at the tavern and deliver the contraband to them.   The third group was a rival gang who were trying to intercept the contraband for their own purposes.  The fourth group was the local law enforcement.   I used teams from the Galactic Heroes companion book.  The smugglers were the Kreng, the Ornks were the gang they were making the delivery to, the rebels were the other group and empire were the local law.
East Moss Landing.  Spaceport in background.  Ornks entered along main road just to the right.  Law enforcement entered along the road just to the left of the trees.

The Kreng ran into trouble early as the rebels opened fir on them putting wounds and/or shock markers on three of the five Kreng. Meanwhile the Ornks advanced through the town to the tavern.   They also came under fire from the rebels.   One of them went berserk  and charged the closest rebel.   The Ornk gang leader snuck into the tavern and waited for the contraband to arrive.   The wounded Kreng recovered and was so enraged by being wounded and seeing another team member killed that he tore the closest rebel apart in close combat,  He then attacked the next rebel and after a couple of rounds of combat tore him to pieces also.   The next turn he charged another rebel and did the same to him.   Mean while the Ornk had killed the rebel he had been fighting.
Another view of the town.  Rebels entered on the road between the lab (two story building) and the container yard.  Tavern is near the center of the picture to the left of the lab.

While all this was going on the law enforcement team had been slowly advancing towards the center of town.   One of them took out the last rebel with a long range shot.   They then headed for the tavern where they broke down the door and proceeded to open fire on the Ornk leader wounding him.  They would continue to fire at the Ornk leader for  several turns causing additional wounds and shock markers.   The Ornk leader finally succumbed to his wounds while making a recovery attempt.
The law enforcement team was plagued with faulty ammunition.   Throughout the game they would take shots at the Kreng, rebels and Ornks with almost half their shots resulting in out of ammo rolls.

While this was happening the Kreng were able to deliver the contraband to the Ornk specialist behind the tavern.    The Ornks then headed for the outskirts of town with the contraband and the Kreng returned to their ship to join the one team ember who had fled to it earlier following a failed shock recovery attempt.

Final results were victories for the Kreng and Ornks.   A total loss for the rebels with all of their team members dead with bits and pieces of most of them scattered about.   The law enforcement team claimed a political victory with one gang wiped out and the leader of the Ornks killed and all of their team members surviving.

The third game was set in a different location.   R. E. Howard, Inc and H. Beam Piper, Ltd.  had established a  joint mining operation n a barren moon.  Eventually they had a falling out and H. Beam Piper, Ltd had taken control of the mining operation.   R. E. Howard, Inc hired a group of mercenaries, Conan's Barbarians, to sized the mining facility.   The mercenaries had two squads of two four man fire teams each riding in an Infantry fighting vehicle equipped with a rail gun.   This was treated as a heavy laser in the rules.   The IFV's had heavy armor.   Both the mercenaries and the security force defending the mining base had light armor.

The security force had five four man teams.  Two of the teams had an Anti-tank rocket launcher and three riflemen, one team had a heavy blaster and three rifle men, and the other two teams only had four riflemen.   Both sides were armed with blaster rifles.

The mercenaries would win by eliminating the security force and/or capturing the power plant.  There was a road going through the mining base from the spaceport to the mines.  Vehicles could drive along it with no problem, but if the attempted to move off road there was a chance they could break through the ground surface and become stuck.   Infantry could move cross country without any problems.

The mercenaries dismounted outside of town and advanced on foot supported by the IFV's   They soon came under fire from the security force.  One IFV was disabled immediately after it put a round through the nearest building in an attempt to take out the guy who had fired on it.  It was eventually knocked out  The other used its railgun to support its team killing a couple of men on the security team.   Though several mercenaries were wounded or shaken, they eventually overcame the security force.   With half the security force dead and several others incapacitated due to wounds and shock hits the surviving members of the security team surrendered.
The mining facility.  Security force fire teams  
another view of the mining facility.   Conan's Barbarians in upper center of picture.
 
The mercenaries advance.  Security teams are actually inside the building.  The figures were moved to the roof after combat began to make it easier to keep track of who had acted.   One mercenary IFV has been disabled.  One squad is advancing along the road while the other is outside the picture on the left.  By the end of the game all the guys in the building were either out of action or wounded.


Wednesday, August 28, 2019

Franco Prussian War Project part 3

I had to curtail painting for this week as of today.   This weekend is the Pacificon Game Expo and I have some household chores to take care of prior to leaving for the convention along with making sure I have everything I am taking to the convention packed and ready to go.  I will resume painting next week.


I was only able to paint and base about 700 French infantry and partially paint others.   The picture below shows the three new Turco regiments (front left), the three new Zouave regiments, the six old line infantry regiments and the eight new line infantry regiments with the glue still drying on some of the bases.

Saturday, August 24, 2019

Franco Prussian War Project Part Two

I finished painting the Prussian Army this week.   Items painted this week were 100+ jagers, 336 cavalry, 210 artillery men, 34 artillery pieces, 21 6 horse limber and gun teams, 37 generals and aides, and a few spares.   Additional work to do is printing and attaching flags and flocking the bases.  Next week I will be starting on the French.  The picture below is most of the figures deployed as the Prussian First Army in 1870 with the Guard Corps substituting for one of the infantry corps and one of the two cavalry divisions.   From left to right Guard Corps with two infantry divisions, corps artillery, and one cavalry division.  The other two corps are the standard Prussian infantry corps of two infantry divisions, two cavalry regiments, a jager battalion, and corps artillery.   The Cavalry division has two cuirassier regiments, four uhlan regiments, and one artillery battery.


Wednesday, August 21, 2019

BlenHeim 1704 at the Miniature Wargaming Society of Sacramento meeting.

The MWS had their meeting on the weekend following the SBGC meeting and I again ran the battle of Blenheim.  The previous game can be found here.  Other games at the club meeting were Napoleonic naval using Form on the Admiral's Wake and DBA

The commanders on the Franco-Bavarian side were Leo as Tallard, Chris as Clerambaut, Aaron as Masim, and Greg M. as the Bavarian Elector.  On the Anglo-allied side Mike was Marlborough, Dave was Eugene, Greg was Charles Churchill and Rob was Cutts.  Both sides were allowed to position their individual units within the deployment areas of their commands.

On the eastern end of the battlefield the Bavarians east of Lutzingen advanced against Eugene's troops.  the cavalry battle there was to go back and forth with the Bavarians loosing the initial contact, but then pushing Eugene's horse back.  On the other side of the town Eugene's men overran the guns, but were eventually driven back by more Bavarian horse.  Eugene's forces would eventually become worn down.   They ended the battle keeping the Bavarians occupied and unable to aid the French.

At the other end of the battlefield the British assault against Blenheim had little success so their infantry pulled back out of musket range.  By holding position they kept the French in the town from pulling out to help in the center.

Masim's command held their position at Oberglau exchanging artillery fire with the allies.  He did send two cavalry brigades to try and help stem the advance of the allies to his right.

In the area between Blenheim and Oberglau the allies advanced engaging the French there.  The outcome of the engagements favored the allies, slowly forcing the French back.  Clerambaut committed his two cavalry brigades and the three infantry brigades to the fighting there instead of moving the infantry into Blenheim as happened historically.  One of the highlights of the fighting in the center was  the charge of one of the British cavalry brigades led by Lumley.  The charge threw back three French cavalry brigades in succession though the British were down to half strength at the end of it and Lumley had fallen early in the charge.

We were only able to complete eight of the twelve turns, but the situation was an obvious allied victory over the Franco-Bavarians as they would soon drive the French horse from the center and be able to sweep around to the rear of the Bavarians.   In addition to Lumley at least two French commanders also fell during the battle.  Five of the eight Franco-Bavarian gun batteries had been overrun and eliminated.    Blenheim had been surrounded and part of it had been set on fire from artillery fire.  Anglo allied casualties had been higher up to this point.
 Franco-Bavarian commanders from left to right Chris, Aaron, and Greg M.
 Mike in the white shirt, Chuck observing the deployment, and Chris
 Greg in front and Rob in the back
 The Bavarians advance against Eugene.
 The Anglo-allies advance against the French. Mike in white shirt and Chuck observing the game.
 Initial Anglo-allied charges are repulsed.  Town of Oberglau near bottom center of picture.
 Action near Blenheim
 Eugene's assault against the Bavarian right.
 Eugene's horse has driven the initial Bavarian attack to the east of Lutzingen back
 Leo watches as the Anglo-allies advane. Lumley's cavalry brigade has just finished smashing through the three French cavalry brigades just above the road going across the center of the picture.
Start of turn six.   The Anglo-allied horse and infantry are about to drive the French center back and swarm across the river.   Blenheim has just been set on fire.  The French artillery batteries have been eliminated.

The Danube was unfordable.   The Nabal river had marshy banks and could not be crossed by artillery except at bridges.  Rules used were Rank and File with modifications   Artillery ranges were cut in half and musket ranges were further reduced to one inch for close range and two inches for long range..  Units were brigades with each stand being a battalion of infantry and several squadrons of horse.   Each infantry brigade represented 2000 men, cavalry were 1000 men, and each artillery unit was 12 guns.  Ground scale was 100 yards to the inch and each turn was 30 minutes.   Cavalry and infantry could pass through each other provided neither was charging, being charged, or routing and one of the units was stationary for the turn.   Linear obstacles and formation changes took 1/4 move and separation distance for charges was one inch. Each named commander was represented on the field

Forces are as follows.  The Franco-Bavarians had one veteran cavalry and one veteran infantry brigades in the brigades commanded by Tallard.   The were four veteran infantry brigades on the Anglo-Allied side.   Two of Lumley's cavalry brigades and all five of Wurtemburg-Neuenstad's cavalry brigades on the Anglo  side were the British and Danish cavalry which had a +1 die roll advantage against other cavalry.  L, M, and H under artillery are light, medium, and heavy smoothbore artillery.  There were 64 infantry figures and 48 cavalry per brigade.  (2,368 infantry, 1776 cavalry).  All figures are from Heroics and Ros.  Both armies were almost equal in overall units with the Franco-Bavarians having one more artillery unit. Each named commander was represented on the field
ARMYWINGCOMMANDINF.HORSEART
TALLARDLLM
ZURLAUBEN2,1
HUMIERES2
ST PIERRE1,1
CLERAMBAUT42L
MARINVAUX3
MARSIM
BOURG2
BLAINVILLE2
ROSEL3
ELECTORLHH
D'ARCO
LEGALL3
MAGNAC3
MAFEII3L
DREUX2
SAUFFREY3

ARMYWINGCOMMANDINF.HORSEART
MARLBROUGHMMM
CUTTS2,2L
LUMLEY2, 1
CHURCHILL
INGOLDSBY2
HORN2
VON BULOW2
HOMPESCH2
WURTEMBURG-NEUENSTADT5
ORKNEY3
EUGENELM
PRINZ MAXIMILLIAN3
WURTEMBURG-TECK3
DE LA TOUR2
ANNHAUT-DESSAU2L
SCHOLTEN3