Stuart Blain was Antiochus III
Bill Clark was Ptolemy IV.
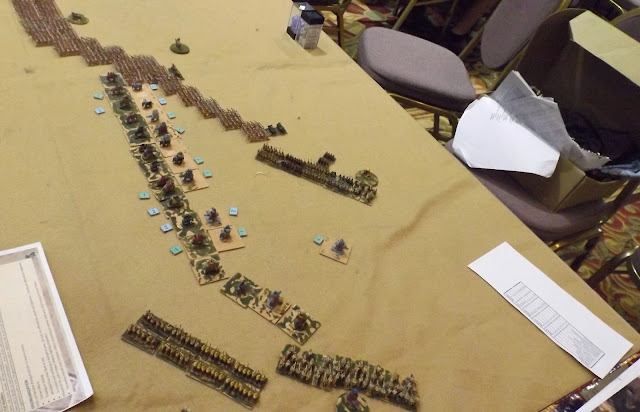
Stuart was to win the initiative for the first four turns of the battle and chose to have Bill move his army first on turn one of the battle. Bill chose to refuse both flanks and advanced his center in echelon towards the opposing army. He moved his elephants forward to delay the flanking forces of the Seleucids.Stuart held his infantry in place as its overall quality and fighting ability was not as good as the opposing infantry. He moved his cavalry off to the flanks to go around the elephants.
The Seleucid cavalry was finally able to attack Ptolemy's cavalry on the fourth turn. Some of the Seleucid elephants on the right flank were also able to attack Ptolemy's left wing cavalry. The two opposing commanders faced each other in combat.
On turn five Bill won the initiative and elected to move first. Some of his left wing cavalry broke and fled from the elephants they had been fighting. On his right flank some of the Galatians and Thracians also fled from the field. The situation was looking desperate for Ptolemy's army. Almost all his elephants were dead or had fled from the battle field. The Seleucids had the advantage on both wings and would be able to turn in on the flanks of Ptolemy's infantry.
At this time we elected to call the game. Though the Seleucid army still had its part of the fifth turn to fight at least one group of units near the center of the infantry line had suffered heavy losses and was shaken. It would likely have suffered additional casualties dropping its morale further. Even if the Seleucids won the initiative and elected to move first on turn six it was quite likely that that group would break causing the other shaken units next to them to rout also. While it was possible that some units might pass their test for routing friends there was only about a one in ten chance of doing so. If Ptolemy's army won the initiative and chose to move first the Seleucid infantry would have received casualties from two rounds of combat and their morale would have been reduced even further.
We started shortly after 9 AM and finished before noon.
All the phalangites are by Rapier Miniatures. All other figures are a mix of Baccus, Heroics and Ros, and Irregular. There are 4000 phalangites, 276 cavalry, 50+ elephants and escorting light infantry, 720 other infantry, and 28 generals with escorts for a total of over 5000 figures.
Rules used were Scutarii from Hoplite Research
http://www.lulu.com/shop/william-butler/broadswordscutarii/paperback/product-21971341.html
Available in the UK from Caliver books
http://www.caliverbooks.com/searchcat.php?words=scutarii&price=&period=
Additional photos of the game
Turn 3 advance of Ptolemy's center
Turn 3 view from Seleucid side
Turn 3 west end of battlefield
Turn 3 east end of battlefield
Turn 4 Egyptian infantry prepares to launch its attack
Turn 4 west end of battlefield
Turn 4 east end of battlefield
turn 4 east end of battlefield final positions
Turn 4 east end of battlefield. Cavalry forces have engaged. Some fleeing Egyptian infantry.
Turn 5 east end of battlefield. Some Seleucid elephants flee.
Turn 5 west end of battlefield.


2 comments:
Looks good, impressive pictures!
Thanks, Phil
Post a Comment