Tuesday, August 28, 2018

Leipzig Project Part IV

Completed the Swedish army except for Generals.    I still haven't decided on the basing of generals at this time.   This didn't take much time.   About an hour or two to repaint the grey or other colors of the figure bases and add ground foam.

Next will be the Austrians, followed by the Russians, and then the French.   I still need to order some figures for the Austrian cuirassiers and some Russian cavalry.   Though that will wait until I have determined what I need for the Seven Years War imagination armies.    That way I will only be placing one order with Heroics and Ros instead of multiple small orders.   

Monday, August 27, 2018

Leipzig Project Part Three

Except for the Generals, the Prussian army has been completed.    This included replacing missing figures, new labels, touching up paint where needed, and adding ground foam to the bases.  This was done over several days and took between eight to twelve hours including the time to make the labels.
There are actually more infantry and guns than were at Leipzig, but the right amount for three of the four corps that were at Waterloo.

 Infantry units are 32 figures on two bases representing 3000 men,   Cavalry are 20 figures on two bases representing 1000 men, and artillery are one gun plus crew on a single base representing 24 guns.


Monday, August 20, 2018

Bloody Big Battles

Played a Franco-Prussian War game at the Miniature Wargaming Society of Sacramento meeting yesterday with Gary Bitters 2mm figures.   The rules were Bloody Big Battles.   Each unit represents 1000 infantry or cavalry or 24 guns.  

The battle was Coulmiers, fought on November 9th 1870 between the French and the Bavarians.   This was one of the few battles that the French won during the war.    The scenario is an extra one that is available for free on the Bloody Big Battles Yahoo group.   The Bavarians are outnumbered almost 2:1, but have much better quality troops than the French.

In order to win the French must capture at least five of the seven objectives on the table.   The Bavarians have the option of deploying one of their formations forward of their main position in one of two villages.   Not doing so allows the French to deploy 12 inches in from their starting edge instead of starting at the edge of the table.   There is also the possibility that one or both sides might receive one of two re-enforcements on turn five.   The scenario has a seven turn limit.

Mike O'Brien chose the French and I commanded the Bavarians.   I chose to deploy one of my units in the village in front of the main objective town, which was worth two objectives if the French captured it.    By deploying the one unit forward the French were forced  to spend at least their first turn attempting to reach the point where they would have started otherwise.


View of the table from the north edge.   White dots are objectives, tan squares are villages, grey squares are towns.


View from the French starting edge.

Movement is variable, based on a die roll and modifiers for formation, etc.   Mike was plagued by bad movement die rolls throughout the game.   The formations advancing through the central part of the table took at least three to move the first twelve inches onto the table.   Mike's right flank was able to advance fairly quickly while this was happening.   My forward formation was able to fire on one of his units advancing in the center disrupting it and halting its advance for a couple of turns.


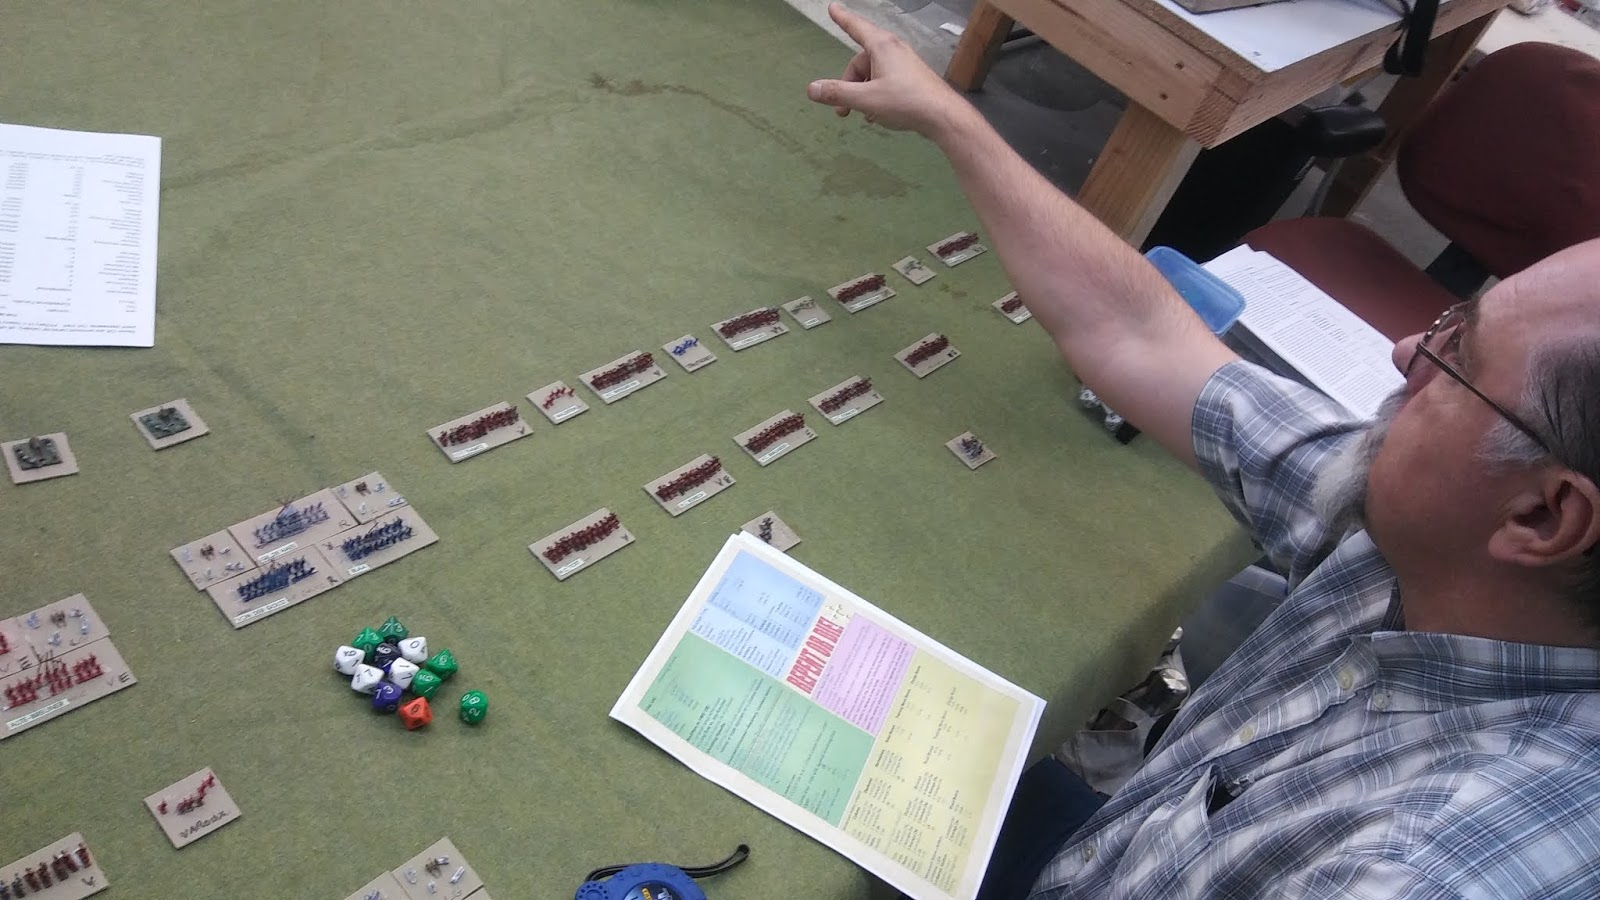
View from my side of the table.   My units are deployed with the forward formation in the village near the top center with earthworks.

Mike decided to take a chance and charged his cavalry unit into my forward formation.   He was able to charge it from an angle that prevented defensive fire.   Though the village did provide a combat bonus, my poor die roll combined with Mike's good roll saw my forward infantry formation driven from the village with losses.   My original plan was to only hold the village for one turn and then withdraw back to my main line at the objective town.   However,   I choose to remain their longer as Mike's movement rolls had kept them from being pressured and they were to halt the advance of other units.   Having been driven back a full move by the French charge, my movement die roll saw the formation recover and move back to where I wanted them in one move instead of two.

Mike continued his advance at this point though poor movement die rolls and disrupting fire from my artillery continued to slow his advance.   I made the mistake of deciding to move my cavalry from my right to help delay the advancing French on my left instead of moving them further forward on the my right to engage the French cavalry and try and turn the French left.   This delayed them two turns as they returned to position.   Mike had advanced his cavalry, but a poor movement die roll on the next turn left them frozen in place and vulnerable to a flank attack by my cavalry.   I was able to score full moves with both units and charged the French cavalry in the flank.   What should have been a victory for my horse turned into a draw due to a low score on my die and a high one on Mikes,  Mike was unable to recover from disruption on his following turn and on my turn my cavalry recovered and again charged into Mike's  only to see another drawn combat.  (Note: this was the type of combat result, not an actual tied die score),  This left my disrupted cavalry vulnerable to a combined charge from the French cavalry to the front, who had recovered and a flanking attack from the French infantry which had taken the first five turns of the game to advance a little over 12 inches from their edge.  (That unit had several no movement die rolls)  The attack saw my cavalry destroyed one unit at a time as the first attack enabled the French to exploit their victory.    

Meanwhile, the right flank French had been able to finally cross the stream and drive my left most unit from the objective village on that side.   That unit destroyed on the next turn by four times its number of French infantry.   On turn five Mike's roll for re-enforcements saw the arrival of several French infantry units on that side which were able to start just six inches from my units.   Fortunately, I was able to pivot my infantry unit on my left center to face the advancing French.    That unit was able to throw back several attacks.

My re-enforcement die roll gave me an infantry formation that arrived in my center rear.   this unit was able to keep the French from gaining the woods objective on the left rear of my edge.   My formation in the objective town was unable to prevent the French from charging it due to a poor firing die roll, but the melee combat saw the French thrown back with losses.  Shooting from that formation had already disrupted and damaged several formations of French infantry rendering them ineffective.


End of turn five.   My re-enforcing infantry has arrived on the road at the bottom center.   The French re-enforcements have advanced on my left flank and my left center unit has pivoted to face them.   Their fire along with the artillery next to the woods and road has disrupted the French (yellow markers).   At the right center my cavalry will soon be attacked by the French cavalry to its front and the infantry to its left rear.

It was now the final turn of the game.   The French had only gained one objective at this point.   They had two units that were within a move of two objectives on my right and had several units that might have been able to possibly advance far enough to engage the infantry unit that I had holding the woods.    While the infantry unit on my right was able to make a full move, the French cavalry once again balked at moving and remained where they were.   The French infantry on my left were unable to advance far enough due to bad die rolls and defensive fire from my artillery and infantry on that flank.


Final positions.   My left flank infantry is disrupted, but is still holding and its fire along with the artillery has halted the French on my left.   In the center are multiple damaged and disrupted French infantry formations.  The big white die is the turn indicator.   To its right are the French infantry and cavalry that destroyed mine.   The Bavarian infantry formation that had held the forward village is in the village to the right of the town.   There is a possibility that if your movement die scores high enough that you can recover lost stands.   However, I was never able to roll high enough for that unit to recover its loss, while Mike did make one roll that was high enough to recover one lost stand.

Final score for the battle was 4000 cavalry and 3000 infantry lost by the Bavarians and about 8000 infantry( I didn't take a count of their losses) lost by the French and only two objectives captured out of seven on the table.   A victory for the Bavarians.

Update - I enjoyed playing the rules and will take part in Gary's next game.


Wednesday, August 8, 2018

New additions

I received my order of GHQ vehicles on Monday and got them primed that evening.    After spending some time, between taking care of other things, yesterday and today I finished painting them this morning.
 Buena Vista additions - recon, artillery command vehicles and Puma IFVs.
 La Cucaracha additions - recon, anti-tank, self propelled mortars, and MRLs.
 Artillery command and a Puma
 Fennek recon vehicles
 2S9 self propelled mortars.
More Pumas


Monday, August 6, 2018

Breitenfeld 1631 Once Again

Ran the battle of Breitenfeld for the game club in Fresno at the local Hobbytown on Barstow Ave.  this past weekend.   Rules used were Repent or Die from Hoplite Research with some minor modifications to weapons ranges.  There were five commands on the Imperial side, two infantry and three cavalry.   The Swedes and Saxons were structured so there were three double commands.  Each double command had one Swedish and one Saxon force.   Left and right wing cavalry commands and infantry centers.  

The battlefield was fairly open with low hills on the eastern ends of both sides, woods in the center of the imperial side and woods at the east end of the Saxon side.   There was marshy ground and a lake off table on the Swedish right.  The order of battle can be seen at order of battle  with one modification.   The Saxon infantry units were combined into five 24 strong infantry blocks.

The battle lasted six turns with the fortunes of war swaying both ways.   There was a lot of action all across the table with some surprises.   All pictures were taken from the Swedish side of the table as there were only two players on that side at the start of the game and additional tables on both sides of the ones we were using.

 Imperial commanders, Jeff on left, Brian on right.  Jeff commanded the left half of the infantry and Brian commanded Pappenheim\s cavalry.
 As the last to arrive Austin was placed in overall command of the army as Tilly and had Collorado\s cavalry reserve.
 Neil commanded the right half of the army.  The Imperials were allowed to adjust their deployment and Neil decided to shift his Tercios to the right.   Imperial guns deployed forward on the opposing hill.
 Mark commanded the Saxons and the left wing  Swedish cavalry.
 The battle begins with Mark advancing the Saxons and Swedes.
 The Swedish infantry center remained in place.  Each Swedish infantry brigade was represented by three infantry bases and two light gun bases.   They also get two fire dice compared to one for the Tercios.
 Dave was Gustaf, commanding the infantry and the right wing cavalry which also held its ground.
 Neil\s cavalry charges into the Saxons while his Tercios advance on the hill.   The combat resulted in most of the Imperial cavalry being thrown back and one Saxon cavalry unit bein routed.   This would cause some chain reaction routs of other Saxon units, but surprisingly most of the Saxons did not run!
 The Imperial cavalry reserve advances on the Swedish horse.   The Swedes are supported by small groups of commanded shot.
 Jeff's Tercios advance on the Swedes.  Artillery fire was not very effective during the battle.   The usual result was no effect.
 Pappenheim\s (Brian( cavalry advances on the Swedes.
 The Imperial cavalry reserve is thrown back.
 The tercios overrun the Swedish guns and make contact with the infantry brigades.
 Pappenheim and Gustaf engage in combat.   Combat on this wing would go back and forth for several turns until by turn six the Imperials were broken.
 The Saxons continue to hold.
 The Swedish infantry repulses the Tercios, but one Swedish brigade is routed taken another with it from the second line.
 The cavalry melee continues.
 The imperial reserve cavalry comes back for more.
 Turn five and Isolano's Croats arrive on the rear of the Saxon flank.   Seeing the Saxon camp (cell phone) the make a dash for it to capture any loot they can.  On turn six they made it to the camp causing the Saxons to check their army morale, fail the test, and finally withdraw from the field.
 Once again the Tercios charge the Swedish infantry.
 Disaster on the Imperial right as most of the Tercios are broken.  Three of them are still in good order on the hill.

The Swedish center collapses as the Tercios break the brigades.   At this point the game was called as a losing draw.  Both sides were close to their breaking point.   We started after 11 and ended before 4.    With the Saxons withdrawing the left wing Swedish cavalry would have been busy pursuing the routing Imperials on that flank..   The right wing Swedish cavalry was chasing off Pappenheim's cavalry   The Saxons performed amazingly well.   In the previous two games they had broken and fled from the field immediately.   


Sunday, August 5, 2018

The Leipzig Project Part Two


Following on from the previous post, here are the other armies that were present at Leipzig.   The French army is organized into a Guard Cavalry Corps, Guard Artillery, Old Guard Infantry Corps, two Young Guard Infantry Corps, five Cavalry Corps, and twelve Infantry Corps.   This is more than was present at Leipzig, but since I had so many extra figures, I added the missing corps that were in other areas.
The French Guard
French Generals to left, infantry to right.   I need to paint some additional generals
French artillery.  I found enough painted guns in the spares to make all units.  Next will be painting the gunners for them
French line cavalry   Gap in the left center is for missing units.
Close up of the Carabiniers.   There were two regiments, but only about 500 total between the two at Waterloo and Leipzig.  I may paint some more to make a full unit of them.
 The Swedish army,   Four infantry units, two cavalry units, and two artillery units.

The Russian army has been organized into twelve commands.   At this point most Russian infantry divisions were very understrength.   Often two infantry corps were combined under a Wing Commander.
 The Tsar was present at Leipzig and is represented at the front left,  Russian army commander to his right,  other generals behind them, and artillery to the rear.

Russian Guard cavalry in center, Cossacks to right and rear.

Russian line cavalry

Russian infantry.

The next step is to finish  one army at a time, by painting the figure bases to match the mat board, then painting and adding any additional figures, followed by flocking the bases.  

The scale ratio for the troops is about 1:100 for infantry, 1:50 for cavalry, and 1:24 for guns.

Friday, August 3, 2018

The Leipzig Project Part One

Years ago I traded my 15mm figures to a fellow club member for his 6mm (actually Heroics and Ros) figures.  Part of that exchange was a large number of Napoleonic figures.   These included figures from almost every army in various stages of painting.  One thing he did when painting them was o use different colors on the bases to help identify units.

I had an Anglo-Allied army, some Prussians and some French that I had been painting for Waterloo.  Combining what I had and what he gave me I found I had almost enough figures to do Leipzig.   At the time I didn't bother to repaint them and went about basing them to see exactly what I had.   After getting them based I determined that I needed some more Cossacks, Austrian Cuirassiers, and some French cavalry.   I also had an excess amount of French guard with bearskins. and others.

Before moving they were used for a few games.   Since then they have been in storage.   This year I finally decided to get them out, fix anything that needed fixing, paint them as needed. and purchase the missing troops.  This is one of the projects that I had listed for this year.   It is also one that I have been dreading due to the amount of work that I expected needed to be done.

The rules I have used organize the armies into brigades.  There are several different rule sets that do this - Volley and Bayonet, Grand Armee, Blucher, and I believe Age of Eagles.   While some of them allow brigades of different strengths I settled on 3000 infantry, 1000 cavalry, and 24 guns.   The infantry and cavalry units are on two 1 1/2 inch square bases and the guns are on one  1 1/2 inch square base.   Nafziger's book on Leipzig provided unit strengths.   In some cases I moved excess men from one corps to another to bring understrength brigades up to full strength.  

The first step was to make new labels for all the units.   After making the labels and applying them to the bases, I found that I will need three units of Austrian Cuirassiers, 6 units of Cossacks, a couple of units of French cuirassiers, and maybe some units of Prussian cavalry.   As can be seen from the photos of the Austrian and Prussian armies there is a lot of work to be done.   This includes painting the figure bases to match the artist mat board I use for bases,  adding missing figures, and painting those that need to be finished.   I several boxes of excess figures that I can use to add gun crews, etc.  I am also going to remount the generals on round bases of different sizes and add new labels to them.

 The Prussians.   From left to right army commander and the two guard brigades which were in the Russian Guard Corps for the battle, I Korps, II Korps, III Korps.   The three Prussian corps were each assigned to one of the three major allied armies (Bohemia, Silesia, and North) for the battle.  I also have additional infantry, cavalry, and guns to bring all three Korps up to strength for Waterloo.   In the background are the storage boxes I use.   I got them at a discount and they will work for 15mm or smaller figures on 40mm wide or less bases.  They are about 7 inches by twelve inches and have four compartments that can be divided if need be.  Several different companies make similar sized containers.  They are stackable.   I use them for my American Civil War and ancient armies also.
The Austrians,   From left to right Advanced Guard Korps, Army commander at front left, I Armee Korps, II Armee Korps.
 III Armee Korps, IV Armee Korps, Reserve Korps.  Artillery Reserve in back and the commander of the Reserve Cavalry (cuirassiers) in back right.