

Sunday, April 27, 2014
From Manassas to Appomattox at Peanut Wars
I ran the fictional early war scenario "The Battle of Rabid Rabbits Rapids" at Peanut Wars this past weekend using From Manassas to Appomattox by Hoplite Research. Both sides had equal forces of six infantry divisions, two cavalry divisions, and six battalions of 6 pound smooth bore cannons. The union army was organized as two equal sized corps of three infantry divisions, one cavalry division, and three artillery battalions. The union elected to keep all their artillery batteries under corps command instead of assigning them to each division. The confederate army had the two cavalry divisions under one corps commander and the infantry divisions under the other corps commander. Each of the infantry divisions had one of the artillery battalions assigned to it. Each infantry and cavalry division had eight stands. Game scale was one inch = 100 yards, each infantry stand = 500 men, each artillery stand = 12 guns, and each cavalry stand = 300 men. For smaller battles there is an alternative game scale where one inch = 50 yards and formations are brigades instead of divisions.
 Greg surveys the battlefield. Both sides had to designate which of the two roads on their table edge their troops would enter on
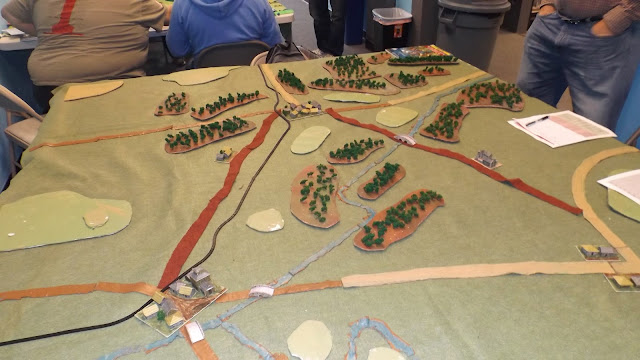
Another view of the battle field. Objectives were control of the two towns with the railroad and/or driving the opposing army from the battle field.
 The first turn. Although units were designated to enter on a certain road there was the possibility of them entering one road to the right or one road to the left. This was to reflect the poor maps and order confusion that happened during a battle. One division from each union corps shifted one road to the right. On the confederate side one infantry division from each road shifted one road to the left.
 The armies arrive on turn one. Some units were held up by units on the road ahead of them. The confederate infantry division at the edge of the table to the right of the cavalry is one of them and has not arrived yet.
 Turn two. One of the union infantry divisions has deployed along the railroad tracks near the eastern town as the confederates advance towards it..
 Western end of the battlefield as both sides deploy.
 The infantry battle on the western end of the battlefield. Action at this end would be ferocious. The confederates would have the advantage in numbers with four infantry divisions and one cavalry division against three union infantry divisions. However, their troop quality would turn out to be not as good as the unions. All troops on both sides were treated as inexperienced and would have to roll to see what quality they were the first time that they would have to take a morale test or engage in melee. All union troops eventually tested as average. Except for the first infantry division on the right which was elite and the second infantry division on the left which was average, all other confederate divisions were poor.
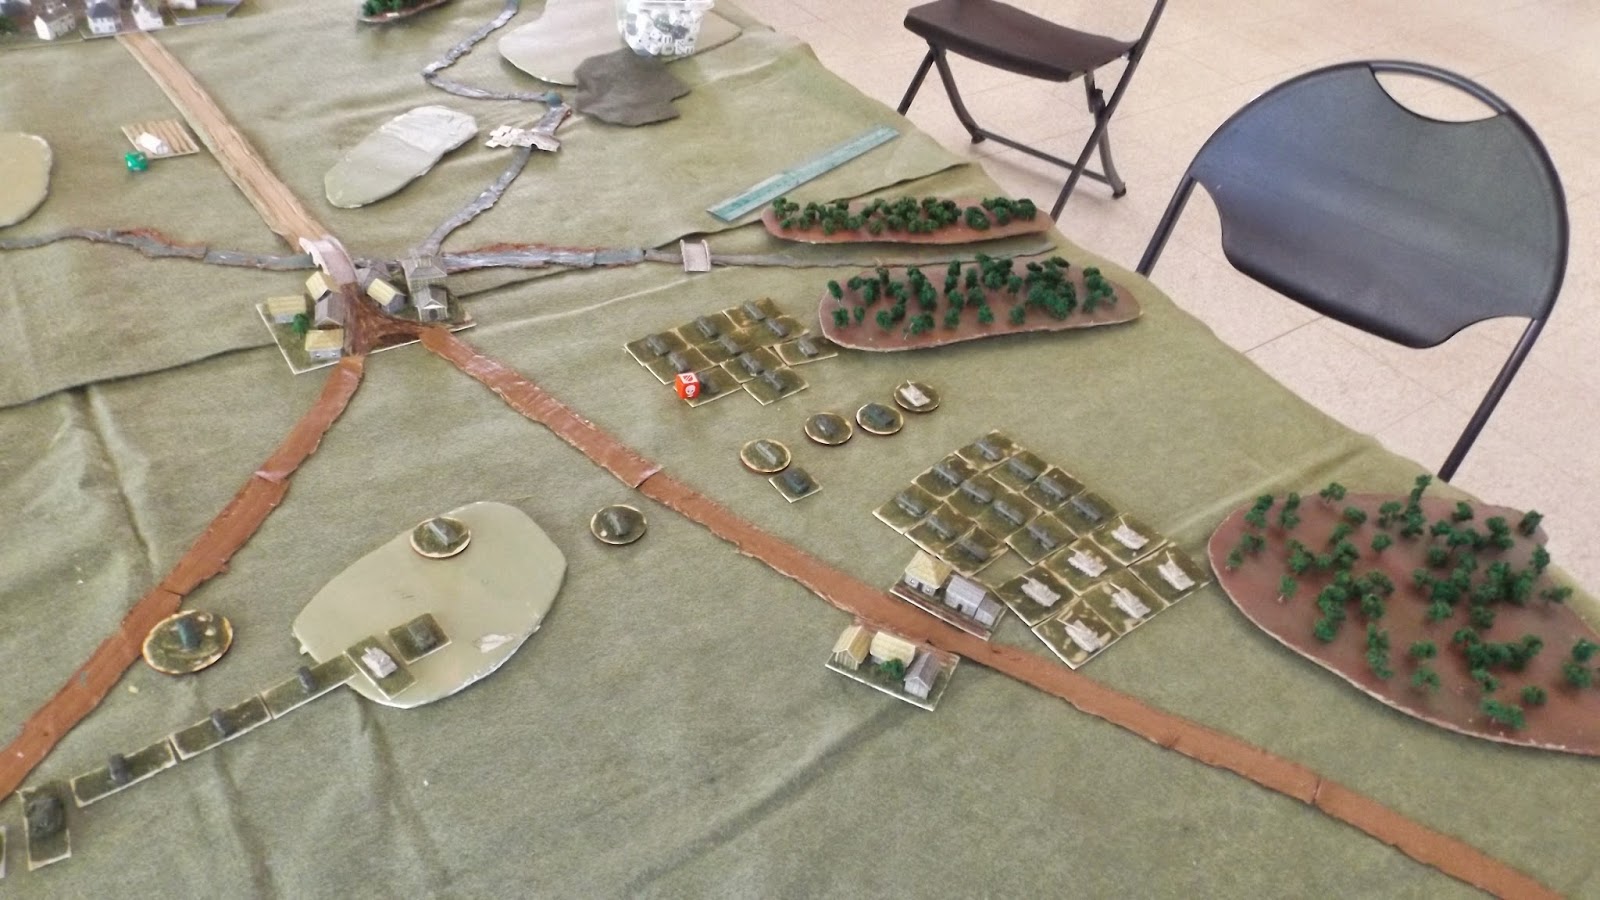
 The battle on the east end. The confederate first infantry division is on the left and the third infantry division is on the right.
 The fighting on the west end. The union infantry division in the center was hit in its right flank and driven back facing its attackers. It was then hit in its right flank by another confederate infantry division and again driven back. About 1500 men from that division would be captured during that turn.
 Action in the center and east. One confederate cavalry division has advanced through the woods near the confederate first infantry division.
 The union cavalry decides to charge the confederate cavalry in the woods.
 Manny Granillo's game of Ridiculous Vanity in the background. The union cavalry in the woods would take heavy losses, but would eventually chase the confederate cavalry away resulting in a popular song.
 Action at the west end of the battlefield. Two union infantry divisions have been destroyed or routed. One of the two union cavalry divisions has moved to this flank as would the one of the two confederate cavalry divisions.
 The fighting at the east end of the battlefield was not as intense as the fighting at the west end. The confederate first infantry division fought an inconclusive engagement with the union infantry while the other divisions fought over the town with the confederates gaining control of it. The confederate cavalry in the center can be seen running from the union cavalry after a failed charge against them. The union cavalry would later be heard singing the following (with apologies to Johnny Horton):
"Yeah, they ran through the briars and they ran through the brambles
And they ran through the bushes where a rabbit couldn't go.
They ran so fast that the hounds couldn't catch 'em
Down Rabid Rabbits Rapids as fast as they could go."
At this point the battle was called. The confederates won a close victory. Both sides held one town, but the union had suffered more casualties than the confederates and the confederates had captured three times as many prisoners as the union had (1500 to 500).


Another view of the battle field. Objectives were control of the two towns with the railroad and/or driving the opposing army from the battle field.


"Yeah, they ran through the briars and they ran through the brambles
And they ran through the bushes where a rabbit couldn't go.
They ran so fast that the hounds couldn't catch 'em
Down Rabid Rabbits Rapids as fast as they could go."
At this point the battle was called. The confederates won a close victory. Both sides held one town, but the union had suffered more casualties than the confederates and the confederates had captured three times as many prisoners as the union had (1500 to 500).
Return to Asculum
I ran the battle of Asculum again for the Peanut Wars Mini Game Convention.using Scutarii from Hoplite Research Games. Charles Liu was Pyrrhus and Alan Sissenwen was the Roman consuls.


 Alan won the initiative die roll for the first turn and decided to move first. He advanced his entire army at the close order infantry movement rate keeping his cavalry in line with his infantry center. Charles chose to advance his infantry in echelon, with right wing leading. He also decided to move his elephant and guard cavalry reserve to his right flank.
 End of second turn. Alan again won the initiative and choose to move first. He advanced his infantry at the close order rate again and attacked the lead elements of the opposing cavalry on his left. During his turn Charles added his unengaged cavalry and Pyrrhus to the fighting. The above picture shows the results of the two rounds of combat at this point. During a player's turn they first resolve any morale checks before moving any units. During their movement phase they may conduct missile fire at any point during their move. After movement is completed both sides conduct melee for any units in contact with opposing units. Markers show the number of "hits" that each unit has received and represent casualties, fatigue, and loss of willingness to continue fighting. The Greeks have not done as well as the Romans. Pyrrhus and the other Greek commander survived their checks for possible loss during combat.
 View of the battlefield at the end of turn two showing refused Greek left wing and players beverages.
 Turn 3. Alan again won the initiative die roll and chose to move first again. The Roman army moves closer to the Greeks and their light infantry tossed their javelins at the opposing troops.

 During his turn, Charles decided to charge with his phalanx units. The Roman light infantry evaded and the pikes engaged the Hastatii. Markers on the Greek infantry are damage from the Roman light infantry missile fire. He has also attacked with two of his elephant units.


 Turn four. Charles won the initiative and chose to move second. Both sides had taken additional damage and had units in critical states due to the number of "hits" they had received. The shaken unit on the Roman left had received enough hits to reduce its morale to zero and was also shaken causing it to rout. The units next to it also failed and routed with it. All the other cavalry units on the Roman left also failed their tests resulting in the entire Roman cavalry wing routing. Since the Greek cavalry was drilled they could test to not pursue the routing Roman cavalry and spend their turn halted and reorganizing. One unit of lancers could not be halted. That unit and the one unit of elephants chased after the routers. The others passed their tests and the shaken unit also recovered. As can be seen the Greek general commanding the shaken cavalry unit managed to survive several rounds of combat. This was not the case with three of the generals commanding the phalanx units and the Roman general commanding the cavalry on the Roman right. The cavalry battle on the Roman right saw one of the Greek cavalry units rout, while the other continued to fight valiantly.
 Start of turn four. The infantry battle. The phalanx is winning the combat against the Hastatii. Since they are two units deep hits are shared between the two units with markers showing damage to the front unit and the rear unit. Also, due to their size hits against them are halved, rounding up. The Roman formation prevents the phalanx units from getting an attack bonus for overlapping their opponents. During his turn Alan would replace the three shaken Hastatii units with the Princepes from the second line. There were a couple of other Hastatii units that had more than a two "hits" of damage that he should have replaced also. This was to be the undoing of the Romans. Also, for some reason Alan had not advanced the Roman infantry on his right to engage the Italian infantry on the Greek left. Up to this point Charles had average to poor die rolls causing only minor damage to the opposing units. During his part of turn four he caused more damage than he received.
 On turn five Charles again won the initiative and chose to move first. Since his units were still in fairly good shape almost all of them passed their morale checks. Two phalanx formations did become shaken. He again caused more damage to the Roman infantry than he received. It was now the Roman turn. Several units had been so badly hurt that their morale was now down to zero or less. When they routed, they caused additional units next to them to test, resulting in more units routing. About half the Roman heavy infantry ran from the field taking the light infantry in the rear with them. At this point Alan conceded. Charles had managed to achieve a better victory than Pyrrhus, having only 500 cavalry from his left flank rout and about 200 other casualties represented by the total of the hit markers on his units.
Initial dispositions. Greeks on the left, Romans on the right. Each unit represents about 500 men or 5 elephants, though the units of Triarii represent fewer men. The phalanx units are also treated differently for this battle using an optional rule. Normally they would be two units wide by two units deep. In this case they are being treated as one unit wide by two units deep. Since I had enough figures for this battle each unit had two bases, except for the elephants and the Triarii who only had one base per unit. When the bases are placed side by side the unit is in open order and when placed one behind the other they are in close order. Units can also be represented with a single base instead of two. The rules allow the use of armies based for DBX/FOG, Warmaster, and others.
View from the other end. Italian allies on right. Almost all the figures in the Roman army are from Rapier miniatures. The phalangites are also all from Rapier. The Greek lancers are from Bacchus. Other figures are mostly Heroics and Ros and some Irregular Miniatures infantry and elephants.
Charles on the right. Manny Granillo owner of Hoplite Research center.
Alan
The other end of the battlefield. One of the Roman cavalry units has failed its morale test and has become shaken.
Additional views from behind the Greek line.
Rules used were Scutarii from Hoplite Research
http://www.lulu.com/shop/william-butler/broadswordscutarii/paperback/product-21971341.html
Available in the UK from Caliver books
http://www.caliverbooks.com/searchcat.php?words=scutarii&price=&period=
http://www.lulu.com/shop/william-butler/broadswordscutarii/paperback/product-21971341.html
Available in the UK from Caliver books
http://www.caliverbooks.com/searchcat.php?words=scutarii&price=&period=
Peanut Wars at Game Kastle Fremont
This past weekend Dan Rygasewicz ran a mini convention at the Game Kastle in Fremont. Games were limited to 10mm or smaller scale figures. A complete listing of games is as follows


Saturday April 26th
--------
SESSION #1
Tiny Drome. WW 2 Air Game
Scutari. Ancients
Pz8. Age of Sail. 1805 Sailing Ship Combat
Panzer Korp. WW 2 Land Combat
5150 Battalion Commander
SESSION #2
From Manassas to Appomattox ACW Combat
Zulu Colonial Game
Ridiculous Vanity Battle Lille.
Sunday April 27th
--------
SESSION #1
Pz8 Coastal Warfare
Cold War Commander Modern WW 2 Land Combat
Starship Sci-Fi space ship combat
Boot Hill TSR old west combat
Star Trek Attack Wing.
Drop Zone Commander pt 1
SESSION #2
Hail of Fire. WW 2 land combat
Pz8 Air rules. Mediterranean
Drop Zone Commander pt 2
Trafalger The British lost this time
PanzerKorps Germans halted Russian advance
Tinydrome apartment sized air combat.
I will have separate postings for my Ancients and American Civil War games.
Sunday, April 13, 2014
Putin on the (f)Ritz or Crimea River
I ran a hypothetical (?!) Russian invasion of Ukraine scenario at the South Bay Game Club on April 12th. The rules were Cold War Commander using my microarmor Russians. The Russians were attacking against a Ukrainian hasty defense. Both sides diced for the force they would use. The Russians were lucky and got the strongest brigade of two tank battalions, one bmp battalion, three btr battalions, and an artillery battalion plus additional brigade assets. The other two brigades only had five battalions each. In addition they also had an artillery brigade of three gun battalions and one multiple rocket launcher battalion.
The Ukrainians were not as lucky when they diced for their force. They ended up with only one tank battalion, one bmp battalion, and one artillery battalion along with the brigade assets.


The Ukrainians were not as lucky when they diced for their force. They ended up with only one tank battalion, one bmp battalion, and one artillery battalion along with the brigade assets.
The commanders from left to right. Charles Liu, right wing Russian commander. James Poli, Ukrainian commander. Dan , overall Russian Commander, Alan Sissenwen , left wing Russian Commander.
Looking East from the Ukrainian side. The game table was 6 feet by ten feet.
View from the South.
View from the North.
The Ukrainians used hidden deployment and had two sets of dummy counters for every real one. Their forward artillery observer took up a position in the church steeple in the middle of the city. The Russians used mobile deployment and entered from the east side of the table. All Russian units made their first command role, but not all made their second. Charles had a double one for his first btr battalion on his second command role. Alan scored double ones for two of his battalions.
End of Russian first turn. The Russians had several preplanned artillery strikes, but they were ineffective, landing on areas where the Ukrainians had placed dummy counters.
Start of Russian second turn. The Ukrainians had called their artillery down on the Russian right wing on their turn as their only action.
Russian right wing, start of second turn.
End of Russian second turn. The Russians experienced command control problems during this turn with only half their battalions being able to advance. Their left wing has reached the river and is preparing to assault across it. Their left wing artillery has laid a smoke screen across the two hills to its front.
Russian third turn. Dan advances his brigade assets.
Russian right wing finally advances though it has a massive traffic jam crossing the rivers.
Russian right wing continues its advance. The Ukrainians have moved an infantry company up to the back of the city.
Russian left wing is held up by fire from Ukraine tank battalion and ATGW company. On the other flank Ukraine recon elements were able to attack the command elements of the Russian right wing eliminating the FAO for that flank, chasing off one battalion commander, capturing another. Russian defensive fire was unable to stop the charge of the Ukrainians.
The remains of the Russian bmp battalion advance to the city. Two thirds of its platoons had been destroyed by Ukraine tanks. Part of the left wing Russian tank battalion has routed. The Ukraine tank battalion would cause heavy casualties on the left wing Russian forces for the loss of one third of its tanks.
 Charles bypasses the town with his intact tank battalion giving the Russians the victory. Ukrainian infantry in the town would take out part of the btr battalion. The remains of the Russian bmp battalion were able to capture the church, forcing the Ukrainian forward observer to flee for his life, seeking shelter with the infantry company.
The buildings are from Paperterrain and Roman seas. All vehicles are from GHQ. Infantry is Heroics and Ros. The railroad track is from Hornby. Trees from Everest Hobbies on EBAY. Rivers and some roads scratch built using DAP brown mastic. Other club games that day were a naval engagement, air combat, bolt action, and Seven Years War.
Subscribe to:
Posts (Atom)