Thursday, November 27, 2014

November South Bay Game Club Meeting

Instead of running a game at the November club meeting I decided to participate in Bob Berman's Indian Mutiny Game.  There were two other games at the club meeting.  These were Lepanto, and a horse and musket game.  All the participants in the Indian Mutiny game play on the British side.  The mutineers have automatic movement when randomly activated.   The British players have action chits that they may play at any time during a mutineer activation to either move, fire, reload, or recover wounded.  The British players had two commands each.   A command consists of two 10 figure infantry companies representing 100 men each, a command figure, and an artillery piece representing a two gun section.  Mutineer units are 20 figures representing 400 men units.  Objectives are the well supplying water for the defenders and the women and children hiding in the white building near the well with my troops on top of it.

 Setting up the game.  Ann in the back and Jim on the left.  My forces are in the foreground and the dark building.
 The battle begins
 The mutineers gain a foothold in Jim's secotr
 My men have fallen back from the corner, but would continue to throw any mutineers back over the wall who crossed.
 Ann's Gurkhas are forced back from the wall and into the dark building.
 Jim's and Ann's commands are forced back to the inner wall
 Lepanto playtest of Thomas Foss' rules
 Neil's French and Indian War game
 Desperate fighting at the building.   The Mutineers were able to force their way into the building.  My men in the building had moved to the rooftop.
We were able to hold out in the inner defenses until the end of the game.  Jim had accumulated a bunch of activations and was able to fire, reload, fire, reload, and fire again decimating the mutineers in front of him.  While the dark building was contested we had held the rest and protected the well.
Harry Flashman and Gunga Din made guest appearances during the game.  Gunga Din helped a group of sunstroke victims recover while Flashman encouraged the Highlanders to fall back to the inner defenses.
 

Sunday, October 12, 2014

Encounter at Crazy Rodent - The Battle

From the Journal of Major  Clouseau

11,10,3014 on Planet Crazy Rodent.
We have encountered the Panthari near the spaceship site.  My battalion was able to quickly advance to the site and occupy it.  One of my platoons located the opening to the spaceship, but as it approached the opening it vanished in a flash of light.   The rest of the battalion took refuge near the base of the ship while the tanks from our brigade engaged the approaching Panthari armor under the command of General Burdine.  

General Kavenkis moved his brigade to the site in order to prevent the Panthari from taking it away from General Lange's brigade and to keep the Panthari brigade of General Pamandanan from outflanking our brigade.  On our left flank General Bratrovich was heavily engaged with the brigade of General Bacchetti. 

Troops from my command were able to locate the controls for opening the spaceship causing a large ramp to lower from the side of the ship.   Before we could enter, a gigantic creature/vehicle descended the ramp and turned towards the Panthari who had been shooting at the infantry from General Henshaw's brigade next to the buildings.  Their fire had struck the buildings, but had not caused any damage.  

The creature was a hideous green color, with two giant claws protruding from the front, a large stalk on top with a gigantic eye,  several tentacles on the top, and hundreds of legs underneath.  The creature emitted a blast of plasma destroying several Panthari tanks

While the creature was engaged with the Panthari, I ordered my battalion to enter the ship and secure it.  Inside the ship was a large hold with several hatches leading to other parts of the ship.   My troops dispersed through the ship looking for any members of the crew and the controls.   We did not find any living creatures on the ship, though there were a few piles of dust in various locations.   We eventually found the control room and by a stroke of good fortune were able to gain control of the ship, halt the creature, and secure the site.


The above is an account of the Future War Commander game we played on Saturday, October 11th at the Crazy Squirrel Game Shop at 464 East Bullard, Fresno.  The shop has a large area set aside for gaming.  There are a number of places within a couple of blocks for food.  The vehicles from both sides were from the FASA Renegade Legion and Terran Overlord Government plastic cohort sets.  figures are from various 6mm manufacturers.  The Ogrethulu is from Steve Jackson games.   Pictures of the game follow. The spaceship and buidlings were items that I had picked up at a convention many years ago.  There were a few blunders during the game.  One of them caused the platoon near the ship to take hits from enemy fire.  As there were no enemy near enough to fire at the time it was ruled as the ship that did the damage causing the platoon to be eliminated.

 Jeff, Brent, and Neal the Panthari Imperium generals.
 Mike and Ron. two of the Federation Generals.  Dave was the third Federation General
 The initial turn.  Part of Ron's command was able to quickly secure the site.
 The engagement heats up

 Jeff and Dave's forces exchange shots.  Jeff's force has taken more casualties than Dave's.
 The action near the site.
Neal attempts to outflank Mike's command.  Shortly after this Ron was able to open the ship and an Ogrethulu came out of it.  The first force it attacked was Brent's.   Meanwhile Ron's infantry boarded the spaceship while the Ogrethulu was facing away.  The Ogrethulu then turned on Mike's command after the lead elements of Brent's force were suppressed by a Federation artillery bombardment.   Throughout the game the Federation artillery was more effective than the Imperium's.  The game was called about 4:30.  Ron had secured the spaceship, but his command had been broken.   The Federation had achieved a Pyrrhic victory by capturing the ship and suppressing the Ogrethulu.

Encounter at Crazy Rodent - Prelude to Battle

From the Journal of Major J. Clouseau
10,10,3014 Crazy Rodent

After landing on Crazy Rodent our force has advanced towards the spaceship site.  We are now within a few kilometers and our advance recon elements have the ship in sight.   It has been confirmed that the Panthari Imperium has also landed a division size force on the planet that is also within a few kilometers of the spaceship site.

We will begin our advance in the early hours of the morning.  Unless things change, we will be engaging the Panthari forces tomorrow. 

Saturday, October 11, 2014

Encounter at Crazy Rodent - Journey to the Planet

From the journal of Major J. Clouseau, commander 2nd Battalion, 9th Infantry Regiment, 51st Division

7,10,3014 onboard Federation Transport Gwendolyn. 

All elements of our division have been briefed on our plans for capturing the spaceship and facilities on the planet Crazy Rodent in the Fresnel star system.   Approximately three weeks ago a survey ship from one of the planets of Unaligned Worlds Region had discovered an unknown type of spaceship and buildings on the second planet of the Fresnel star system.   They had given the planet a name used in their language for a small, furry, tree dwelling, nut gatherer, with large incisors and an erratic behavior.  The nearest translation of the name is Crazy Rodent.

Upon learning of the discovery Federation High Command ordered our division to embark on our transports, head for the Fresnel system, and secure the site.  It is believed that the Panthari Imperium has also dispatched a military force to secure the site for the Imperium.

The 51st has six mechanized infantry battalions, three tank battalions, three artillery battalions, and division support units.  All combat units are equipped with grav vehicles.

The briefing also included the survey report and video conducted by the independents.  While surveying the planet they had spotted an anomaly on one of the land masses.  Closer observation revealed a spaceship of unknown design and three buildings.  Two of the buildings were spherical and the center one was a pyramid.   A remotely piloted drone was launched to take a closer look at the site.  While the ship and structures appeared to be in excellent condition, the site also seemed to be quite old.  As the drone moved closer to the structures and ship, the transmissions from it started to degrade.  The crew of the survey ship was able to move the drone away and was able to determine that staying about 10 kilometers away from the ship and structures did not result in any degradation of the transmissions from the drone.   The survey crew elected to not attempt to land and inspect the site and after recovering the drone, immediately left the system to report their find.

Crazy Rodent is a Terrestrial world with no signs of intelligent inhabitants.  The site is located in a hilly and wooded area with a stream passing next to the ship.   There are the remains of some roads at the site that lead to a pair of excavated areas.   The roads are badly decayed and the excavations are overgrown with vegetation.   The excavation sites appear to have been quarries. 

Our plan calls for the my battalion and the rest of the brigade under the command of General R. Lange to advance in the middle between the other two brigades and secure the site.   The other brigades are to secure the area around the site.

Monday, September 1, 2014

Asculum at Pacificon

The second battle that I ran at Pacificon was Asculum.  The rules were Scutarii from Hoplite Research.  There were six new players for this battle and one who took part in Raphia.  The scenario was slightly modified from the original in the rule book.  The values for the Macedonian phalanx were changed to match the rest.  For this scenario all the phalanx formations are treated as double wide and double deep formations instead of two units by two units.  Also, the Italian and Mercenary infantry should probably have a defense value of 6 instead of 5.

Although this battle will fit on an eight food wide area for 40mm bases, it was fought on the same ten foot wide set of tables used for Raphia.  Once again the outcome of the battle would not reflect history.   At the start of the battle Pyrrhus shifted his guard cavalry and elephants to his left flank.  Neither army was able to gain an advantage in the cavalry combats on either flank until the elephants arrived and helped break the Roman right wing.

Mean while the infantry of both armies had advanced.   The Roman light infantry had moved ahead and began pelting the opposing infantry with their javelins.  They were able to get a couple of turns of missile fire before withdrawing behind their heavy infantry.  The Romans had moved obliquely towards their right while advancing.  The Pyrrhic battle line then advanced into contact with the Romans.   As the fighting in the center continued the Romans withdrew some of their exhausted Hastatii from the front line and replace them with the Princepes.   Part of their light infantry was sent to help support the flanking cavalry.  Much of the Italian infantry on Pyrrhus' left flank eventually fled, though enough remained to protect the left flank of the phalanx.  Both sides infantry had taken a beating, with one Hastatii unit in the Roman center at the breaking point.  The Roman's won the initiative and chose to have Pyrrhus move first.  Initial morale checks saw some of the pike formations break and with the rest likely to join the Romans won.   If the Roman's had moved first it is quite likely that part of their center would have routed, possibly causing other units to rout, causing a Roman defeat.   However, with the Greeks routing they would have received a morale bonus when they checked.

There are about 4500 figures for this battle.  They are a mixture of Rapier, Baccus, Irregular, and Heroics and Ros.  All the phalangites and almost all the Romans are from Rapier.  The battle started about 2 and finished about 5.  The following are pictures from the battle:

 Initial deployment from Pyrrhic right/Roman left.
View from opposite end.


 Start of battle.  Greeks on right Romans on left.
 Pyrrhus (Ix) contemplating the battlefield

The Roman commanders.
 Turn 2.  Roman light infantry annoying Pyrrhic infantry.
 Roman light infantry withdraws
The Greeks advance to contact
 

 Cavalry action on the Pyrrhic right/Roman left
 
Tarantine phalangites hold back.
 View of the middle of the battlefield from behind the Roman lines.
 Right wing Greek cavalry contacts Roman left wing cavalry.
 Right end of Pyrrhic infantry turns in on Roman left flank
 Most of the allied Italian infantry routs.
 Cavalry and elephants on the Roman right/Pyrrhic left
 
End of battle as phalanx starts to rout.

Raphia at Pacificon

Raphia was the first of two battles that I hosted at Pacificon.   The rules used were Scutarii from Hoplite Research.  There were six players who had never tried the rules before.   I would like to thank Mike O'Brien from the Miniature Wargaming Society of Sacramento who came by and assisted with running the game.  I was a bit concerned about this battle as there were over 150 units per side and all the players had not seen the rules before.  Each unit represented 500 men or 4 elephants.   Even though many of the infantry formations were deployed in depth the armies occupied almost ten feet (3 meters) of frontage using 40mm bases.  It probably would have been better to have another 2 1/2 foot wide table added to this.  Ten feet is slightly over 4.5km wide.  Another 2 1/2 feet would increase this to just over 5.6 km.   There were 5000 figures used for this battle with about 4000 of them being phalangites.  The figures are a mixture of Rapier, Baccus, Irregular, and Heroics and Ros.   All the phalangites are from Rapier.  The Arabs and Asiatics are from Baccus.  Thracians, Gauls, and Lydians from H&R.  Elephants and cavalry from all four.

Polybius is the main source for this battle, providing detailed numbers and dispositions for both armies.  The Seleucid army had 62,000 infantry, 6000 cavalry, and 102 elephants.  Ptolemy had 70,000 infantry, 5000 cavalry, and 73 elephants.   There were 35,000 phalangites in the Seleucid army and 61,000 in Ptolemy's army for a total of 96,000 phalangites.   The point an combat values for both armies are as below:

Unit TypeAttack DefenseMoraleCostPtolemySelecucid
Guard Cavalry5511111144
Settler Cavalry4510105080
Mercenary Cavalry351110400
Guard/Mercenary Phalanx36119234270
Macedonian/Settler Phalanx36108448320
Egyptian Phalanx36972800
Arab/Asiatic Infantry35950200
Thracians/Galatians/Lydians351178428
Indian Elephants4610130325
African Elephants3610122160
13631267

Historically, the right wing cavalry of both armies defeated the opposing left wing.  Ptolemy left his guard cavalry and moved to the infantry center.  Anticochus pursued the opposing cavalry instead of turning on their center.  Ptolemy's right wing cavalry did not pursue and turned on the left wing of the Seleucid infantry causing them to flee, this caused all the other Seleucid infantry to rout.  The infantry of both armies had held back from contacting the opposing infantry.

The re-fight was to take a slightly different path.   The Seleucid right wing defeated their opponents and instead of pursing halted and reformed.   Ptolemy had moved to the infantry.   On the other wing, Ptolemy's cavalry directly engaged their opposing numbers instead of attempting to skirmish and out flank them.  This would result in a drawn out struggle that eventually saw the Seleucid cavalry triumph on the left flank.

In the center both of the infantry lines had held back.  Ptolemy's infantry advanced to engage the opposing infantry.  The fighting was intense.   Part of the left end of the Seleucid infantry broke and fled, but the rest held   Eventually part of the Egyptian phalanx broke, the resulting morale checks caused more units to rout.  At this point the players on the Ptolemaic side conceded as it was quite likely that most of the rest of the army would fail their morale checks for friends routing and join them.

The following is the basic turn procedure for Scutarii.   Both sides dice for initiative with the higher score determining who moves first during a turn.  Any troops for the moving side that have to check morale do so before any units are moved.  Troops that have missile weapons may use them at any point during their movement and continue to move if they still have movement left.   After a side has completed moving, any opposing units in contact will resolve hand-to-hand combat.  Units roll a number of dice based on their attack factor, taking into account any modifiers, and must score higher than their opponent's defense value to cause a hit.   Hits are cumulative and are not removed.    These will cause a unit's morale to decline and represent fatigue, casualties, and loss of fighting spirit.

The following pictures are from the battle.  Unfortunately, I had left the container with the hit markers at home and had to resort to some sticky labels to keep track of the hits.   Fortunately Mike O'Brin found some blank counters at one of the dealers and these were used to replace the sticky labels.   The battle started just after 9 and finished shortly after noon.


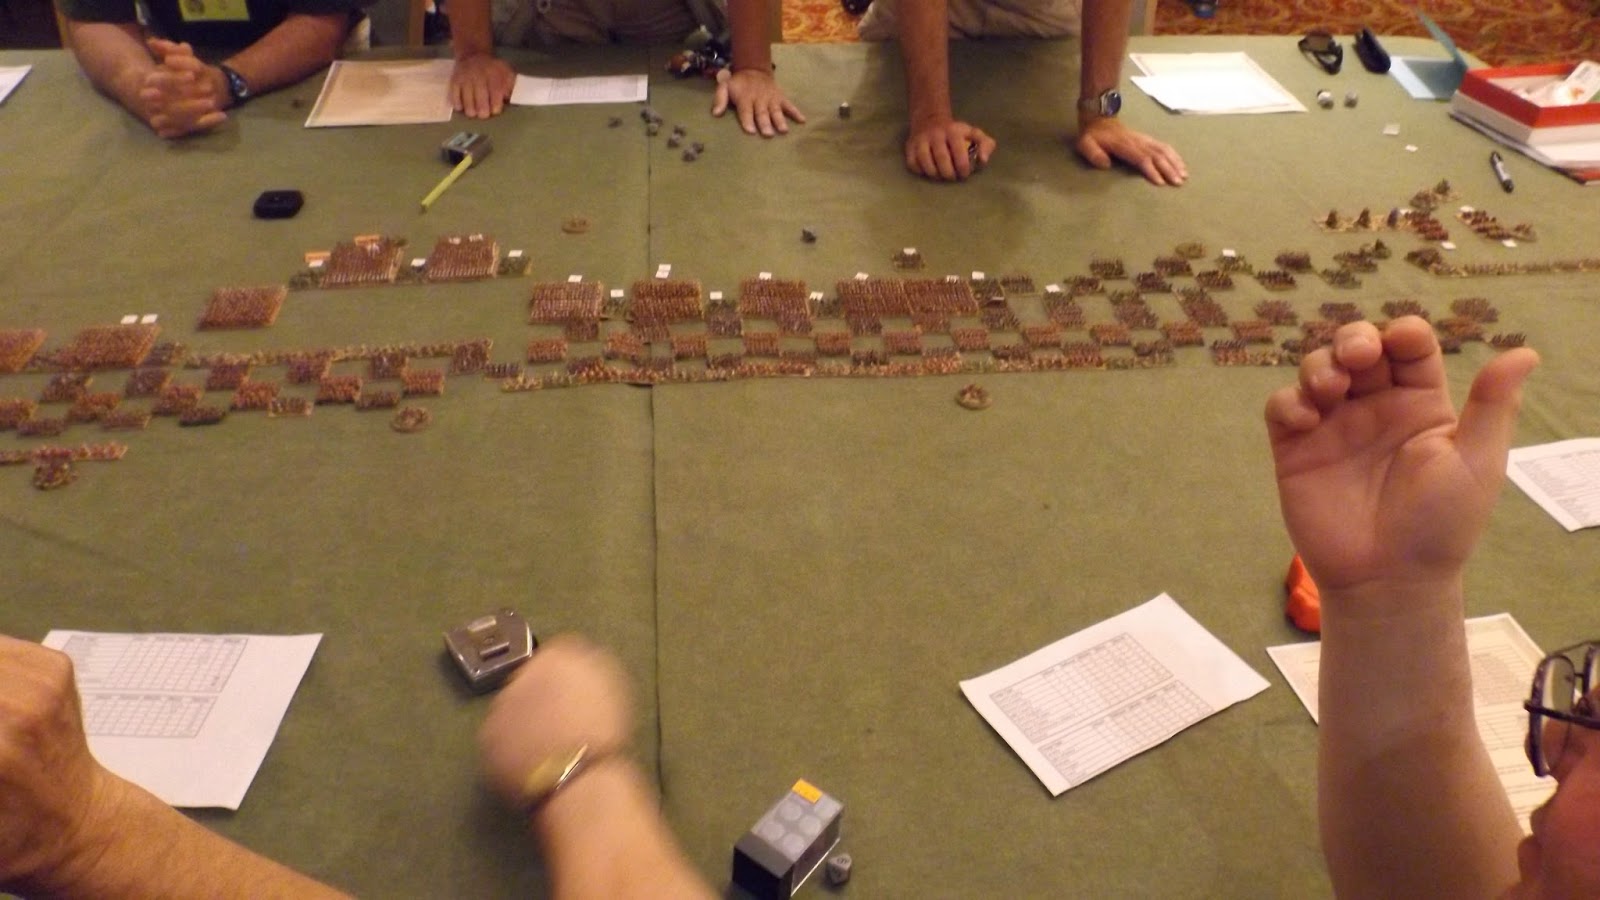
 Start of battle as viewed from Ptolemy's right/Seleucid left.
 Seleucid cavalry advance.  Bob Burke commanding left flank of Seleucid army.  Ed Gonsalves commanding Ptolemaic center.
 The elephants and cavalry engage in combat on that flank.
 Cavalry and elephants on the other flank
 Combat continues on Bob's flank
 view of the center of the battle from behind the Ptolemaic lines
 Cavalry and elephant action continues on Bob's flank
 view from behind the Seleucid lines

 Antiochus defeats the opposing cavalry and prepares to move on Ptolemy's infantry flank.

End of the battle as Ptolemy's phalanx starts to collapse


Pacificon

As usual, Pacificon had a wide variety of games.  Role playing, boardgames, miniatures, etc.   It looked like there were fewer dealers than at Kublacon.    The following pictures are from the various games and dealer area in the main ball room at the hotel.   The role playing games were in another section of the hotel.

 The dealer area
 Nick Sterns huge 54mm game
 Memoir 44 Normandy invasion
 Aircraft take to the skies
 WW1 action

 The other airplane combat
 Pirates! game
 Sci-Fi combat
 Board game area
 another view of the Pirates! game
ww2 action setting up
 Pirates!  game master in costume
 Steve Montgomery's ww2 infantry skirmish game
 The large Memoir44 Normandy game